Backsplash Reveal: Grout-Heavy, Glassy, and Glorious—Let’s Talk About Sealing!
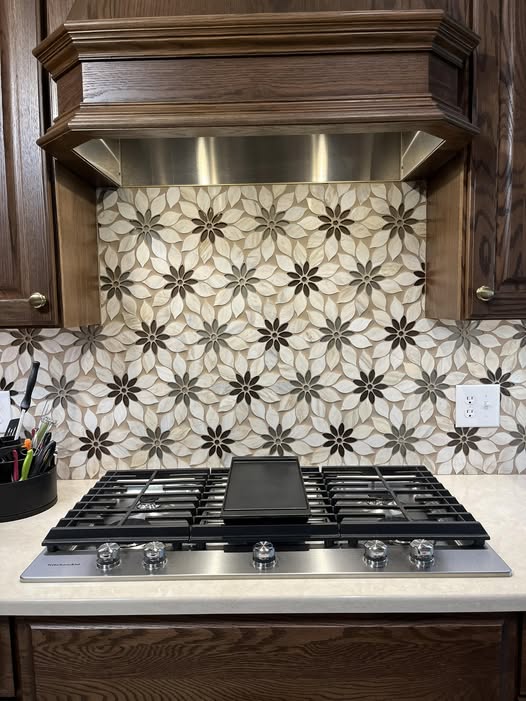
So, our backsplash is finally in, and I am in LOVE!!! Yes, it’s heavy with grout, and yes, it’s a bit bold—but I truly wouldn’t change a thing. It’s not going to be everyone’s taste, and I am 100% okay with that. This one was for me, and I have absolutely zero regrets—even if it’s not the easiest surface in the world to clean!
This beautiful, intricate glass flower tile was sourced from Home Depot, although it’s also available online at TileBar. We chose HD simply for convenience (and the return policy, which came in handy!). And here’s my biggest tip right off the bat: order more than you think you’ll need. Trust me. We had a lot of broken pieces in our shipment—thankfully, Home Depot accepted the returns, no questions asked—but if I hadn’t over-ordered to begin with, the project would’ve come to a screeching halt.
Now that it’s installed, I’ve been obsessively staring at it, loving every angle, every sparkle of the glass. BUT—I do have a few small regrets about not inspecting every single tile before installation. A few of the flowers had chips on the backside of the glass, which aren’t super noticeable unless you’re right up on it, but still… if you’re using this tile, give each sheet a good once-over before sticking it on the wall.
This brings me to the next important topic: sealing. Since this backsplash is right behind my sink (hello, water splashes, soap, toothpaste, all of it), I want to make sure it stays looking as gorgeous as it does right now for as long as possible. With all that grout and those delicate glass pieces, sealing is a must.
After a lot of research and a few conversations at my local hardware store, I’m leaning toward a penetrating grout sealer—something like Miracle Sealants 511 Impregnator or Aqua Mix Sealer’s Choice Gold. These are both great options for water-prone areas like kitchens and bathrooms. They sink into the grout to protect it from stains and moisture without leaving a visible sheen on the tile itself, which is perfect since I don’t want to dull the glass finish.
If you’re using a lot of grout (like I clearly did!), make sure to apply the sealer with a sponge or small applicator brush and work it into every little crevice. You’ll probably want to do a couple of coats, letting it fully dry between applications. And don’t forget to wipe off any sealer that gets on the glass tile before it dries—it can leave a haze if it sits too long.
At the end of the day, I couldn’t be happier with this statement backsplash. It’s unique, dramatic, and totally me. Cleaning? Worth it. Grout lines? Love them. Bring on the sealer—this beauty is staying around for a long, long time.