Building a Wardrobe on a Budget
Spray Painting my Stand Mixer
 This post – like most of my home-related content – is long overdue. I tend to get hung up on room reveals and project reveals because it seems like the space is never quite done. Part of that is because at any given moment Eric and I have 3-4 house projects going at a time, so things tend to get put on the back-burner from time to time. And another part is that as much as I want a space to be ‘done’ it never feels like it is. There are always small adjustments to make and finishing details that get kicked down the line as we move from one project to the next. And while I know eventually it’ll be complete, it can make it hard to share what feels like an unfinished job.
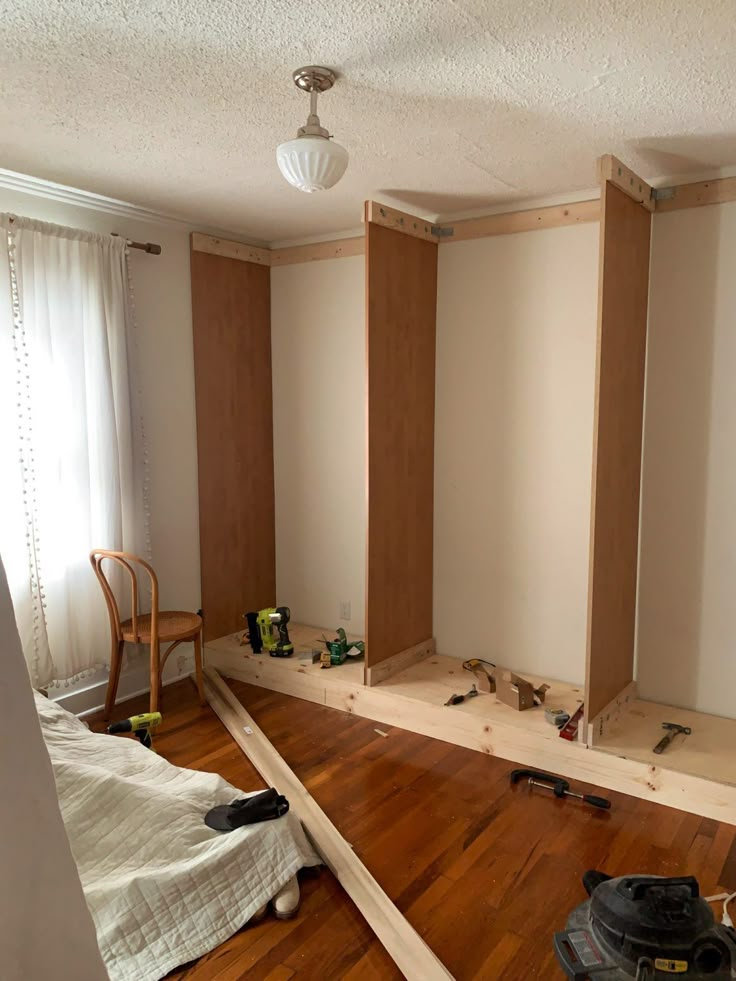
All that to say that my wardrobe reveal is finally here, and while NO, it’s not 100% complete, it’s certainly far along enough for me to share it with you today. A few of you may remember that over the Summer we switched bedrooms, and moved out of this bedroom in our house. We moved to the front of the house (there’s only 2 bedrooms in this house) and left this space empty for some time. When we eventually decided to transform the closet in our new bedroom into a teensy water closet, we realized that we needed a place for all of our (ok ok, mostly mine) clothing and shoes. So Eric elected to build a custom wardrobe running along one of the walls in our second bedroom and turn it into a sort of walk-in closet.
I wanted to be careful with this space, as I didn’t intend to use it as a ‘cloffice’ like I did with the second bedroom in our last place. I’ll be honest, the idea of having all of my things and purses and shoes on display just really no longer appeals to me, and isn’t something I think I’ll ever do again. It leads to excess and feeling a bit like one is living in a shop of some kind, and that just wasn’t sitting right for me. And while I still have FAR too much and am working daily to whittle it down, I love that I can close the doors on my clothing and wardrobe and have it disappear in a sense.


Eric built these wardrobes on a budget, and while I wish I had step-by-step instructions for you, I unfortunately don’t. Mainly because parts of this were repurposed from our old closet (the standing dividers you can see above were ripped out of an old closet system the previous owners had installed) and the rest of it was pretty much Eric getting pieces of wood and just sort of coming up with his own plan to bring the space to life. We had thought about doing an IKEA wardrobe hack, but we went this route because it was a LOT cheaper. It meant more work and measuring to get it just right, and it also means that I don’t have any handy links to provide. And for that I hope you’ll forgive me!
I knew early on I wanted 3 sets of double doors (which Eric custom made), I wanted it to look like it could be part of the room, and beyond that I just wanted enough shelves and rods to hold all of my things and nothing more. Anything that didn’t fit once the closet was built we got rid of, and it’s made me more mindful of what pieces I choose to keep.

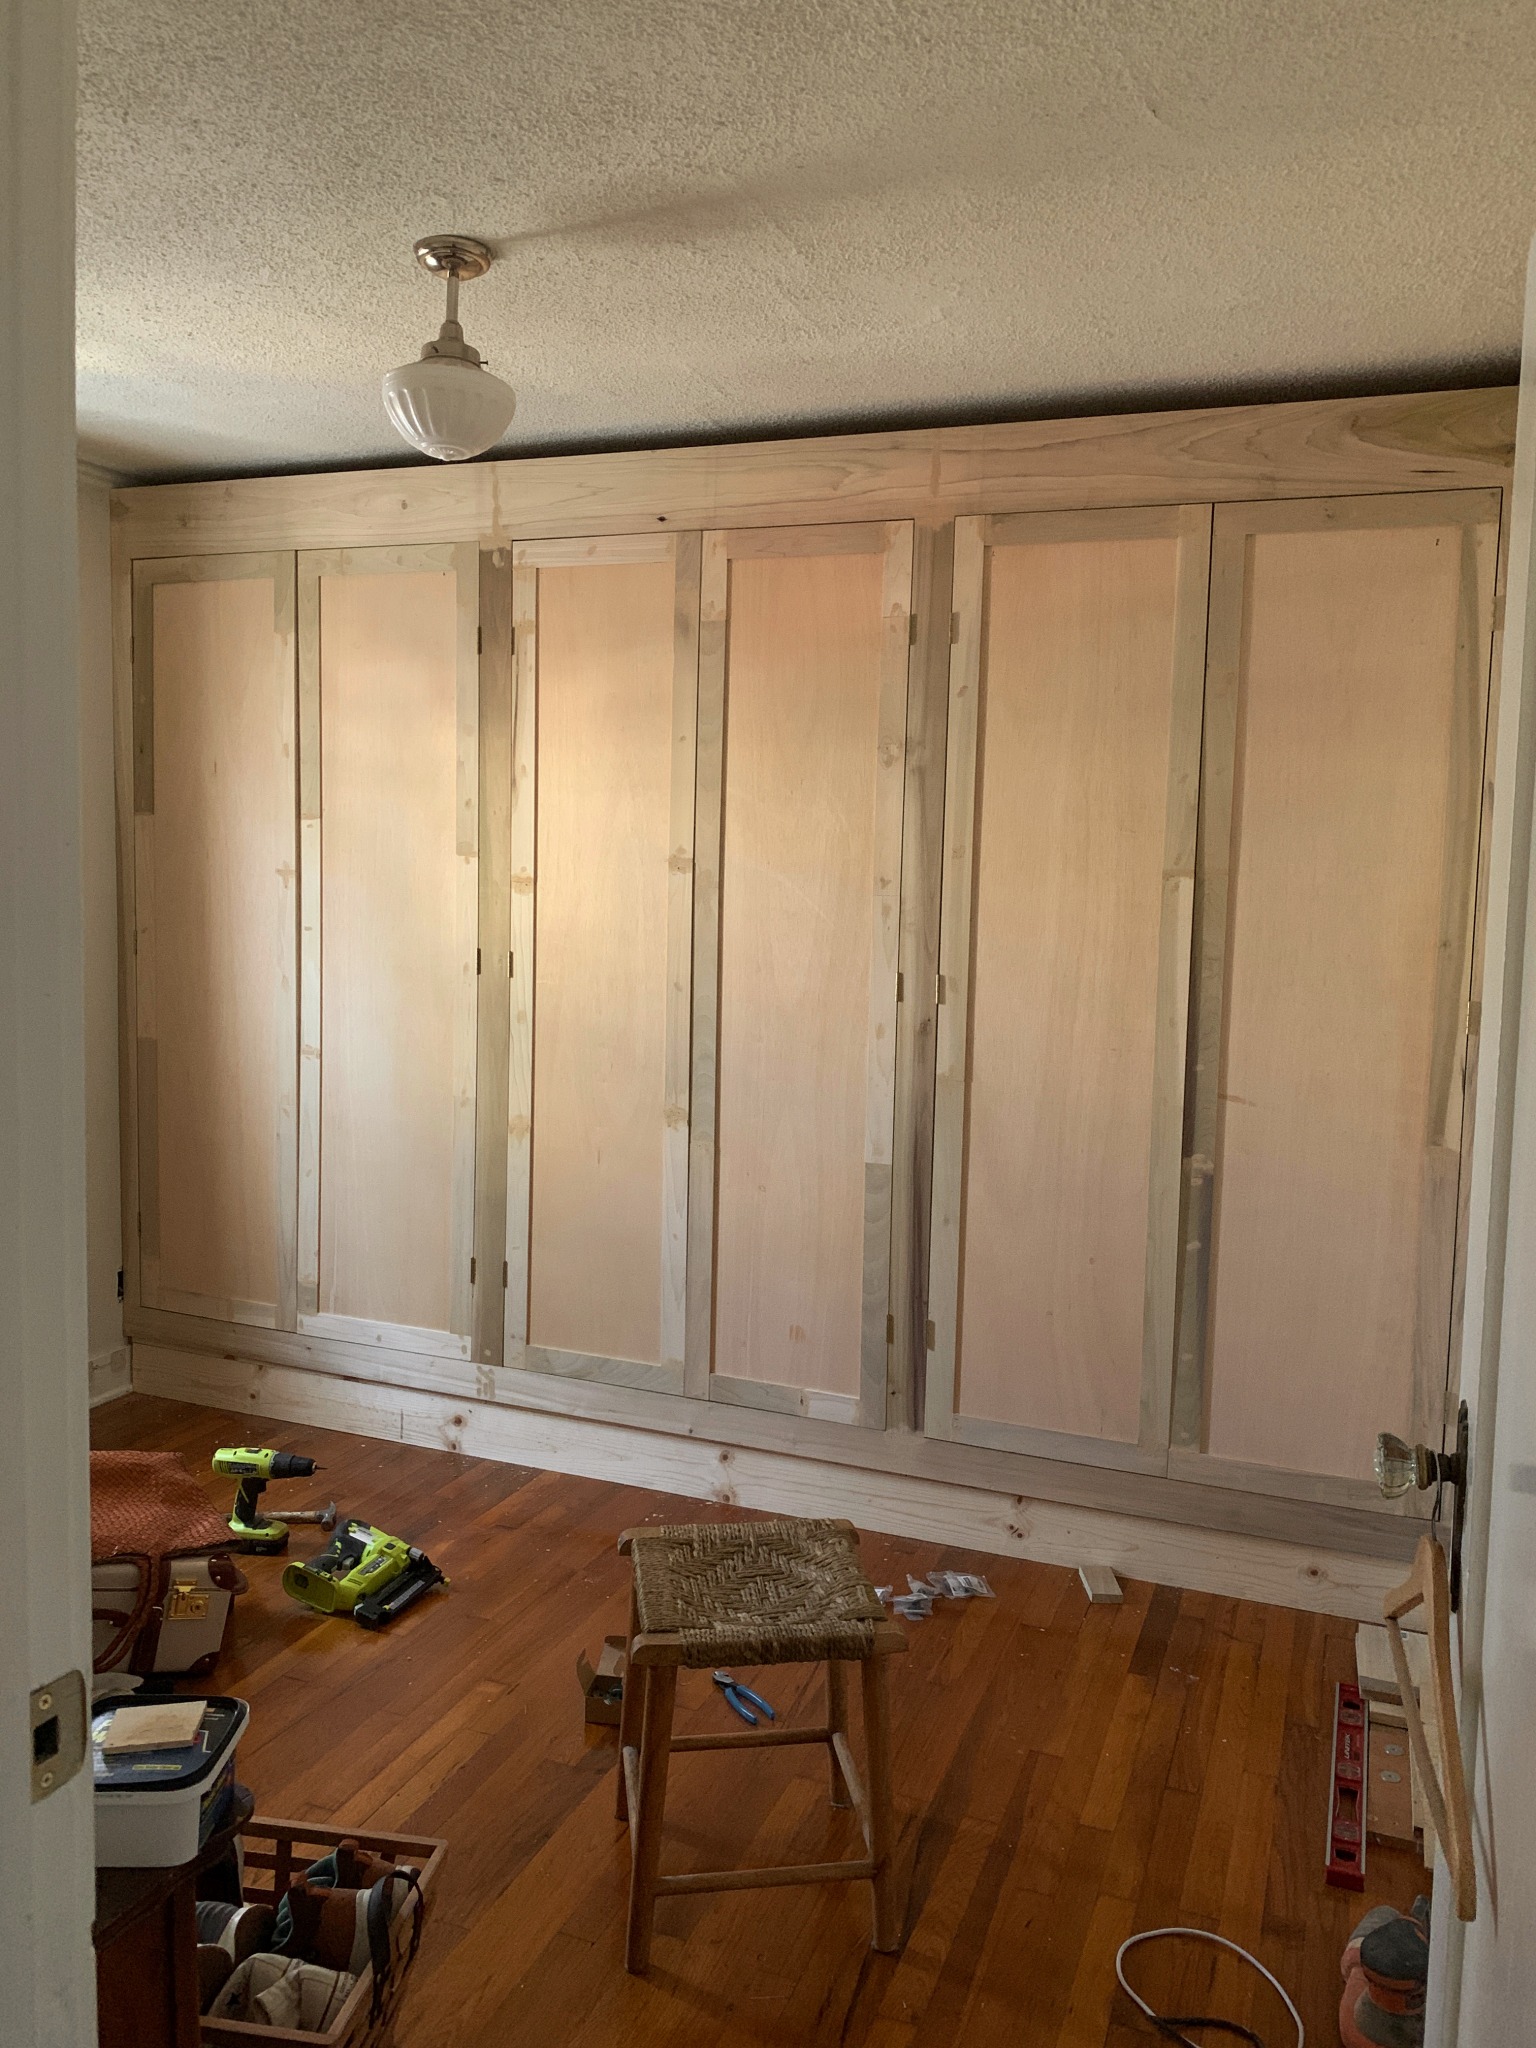
The details I can share with you are the paint color (it’s Celery seed from Magnolia) and the light fixture is this one here with this medallion (identical to the one in our bedroom). Beyond that, what you’re seeing here is what I dreamt up and Eric was able to bring to life by teaching himself how to build cabinets by watching YouTube videos. So if anything, I hope the takeaway here is that you can absolutely do something like this yourself, but you’ll have to figure out just what works for your own space since we are by no means experts.
As far as the plans for the rest of this room? We have no idea! We don’t need a second bedroom for anything, and since I like to work from my desk in the living room, there are no plans to put a desk in here. We may put in a comfy arm chair or a place to hang out, but as of right now, it’s mostly just this closet space. We’re taking the planning and decor with this house (our first house) slow, and trying not to rush anything. Which is why this post took a while to come along, but I hope it was worth the wait.


