These DIY curtain rods play perfectly with my organic modern style with the use of wood and leather. Plus, they come at an unbeatable price!
Affiliate Disclosure: I may earn a small commission for my endorsement, recommendation, testimonial, and/or link to any products or services from this website.
When designing our dining room, I knew I wanted floor-to-ceiling curtains to make the space feel a bit grander. I ordered these light filtering linen curtains in 108′ to carry our 9ft ceilings (shop my favorite linen curtains here!). However, I still had to find curtain rods to hold them. I initially purchased some wood-look curtain rods, but they didn’t look quite right in our home. I am always amazed that something as simple as a curtain rod can cost so much!
Instead of buying more, I began brainstorming ideas to make my own curtain rods that fit my style and budget. Set on the idea of wood curtain rods and wanting to also incorporate leather into the dining room, I thought up this simple design. It seemed easy enough, so I went for it!
Since then, I’ve added these same DIY curtain rods to our master bedroom as well. I changed a few things the second time around, so those tips are included in this post.

DIY Curtain Rods for Under $10
Supplies Needed:
- 1” Wood Dowel* – $4
- 10″ x10″ Tooling Leather – $5
- Screws (and drywall anchors if needed) – $0.55
- Screw End Caps Black Plastic or Brass (optional to make the screws appear like a nail head) – $0.68
- 220 Sandpaper
- Wood stain or paint (optional)
- Finials (optional)
*For the dowels, I used 1¼ inch in the dining room and 1 inch in our bedroom. I would recommend 1” down to ½” to make sure your curtains slide easily.
Tools Needed:
- Drill or screwdriver
- Scissors
Since everyone asks about my curtains – My favorite linen blend curtains from Amazon | My previous favorite curtains from Target

Steps to Make Wood and Leather Curtain Rods:
1. Cut the Dowels to Length
For our dining room, I bought a 96″ dowel and had Lowe’s cut it in half for me. The two halves weren’t quite the same size, so I trimmed them to the exact same size at home. For the length of my DIY curtain rods, I measured 8-10 inches beyond each side of the windows to allow the curtains to frame the windows. This accounts for the leather straps, an extra inch of the dowel to stick through past the loop, and space for the curtains to hang without blocking the windows.
2. Sand the Curtain Rod Dowels
The dowels are fairly smooth to begin with, but you’ll still want to sand with fine sandpaper (I used 220 grit) to smooth it out so the curtains can slide smoothly on the wood. I didn’t do this with the curtain rods in our dining room (purely out of laziness), and they did snag on the curtains a bit. However, I don’t plan to move those curtains at all, so they’ve remained that way for now.
In our bedroom, I took the time to sand them and it really doesn’t take much to make them perfectly smooth! I simply wrapped my 220 grit sandpaper around the dowel and did a light sand. It only took a couple minutes!

3. Cut the Leather into 1″ or 2″ Straps
The thickness of your leather straps is really a personal preference, but I recommend a minimum of 1 inch and max of 2 inches. Once you decide on a width, measure and cut the leather to size. I left them at the full 10 inch length so there was plenty to wrap around the dowel and mount to the wall.
4. Pre-Drill Holes into the Leather Straps
We pre-drilled the holes into each side of the leather strips so it would be even and clean when we drilled them into the wall. For this step, I measured 1 inch from the end of the leather strip, folded it in half so the ends matched up, then used a small drill-bit to drill through both sides at the same time (this made it easiest to ensure both sides were perfectly aligned). You could also punch holes through the leather if you don’t want to drill through it.

5. Mount the Leather Straps
I think we measured about 5 times before mounting the leather straps. This is always the most stressful part for me! When measuring where to mount the straps, you’ll want to make sure you bring them in enough to allow about an inch of the dowel to stick out past it. I am a very visual person, so I always have my husband hold up the curtains so I can see where they should be mounted and measure from there. For both our dining room and master bedroom, we mounted the leather straps 5 inches from the ceiling (this allowed the curtains to puddle just a bit on the floor).
Before mounting the leather straps onto the wall, we pre-assembled them with the screws and caps. If you’re using drywall anchors, screw those in. Then screw the leather strips into the wall and snap the caps closed.
6. Hang Your Curtains!
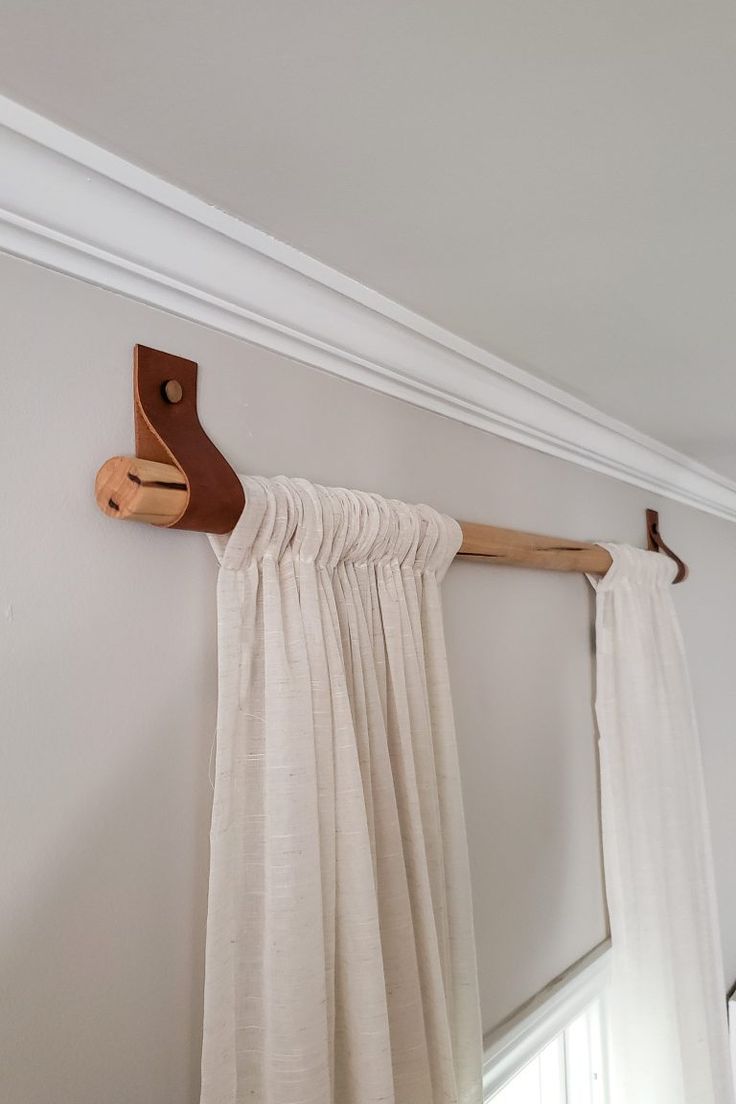
Once the leather straps are up, all that’s left is to slide the curtains onto the dowel and slip each side of the dowel through the leather straps. Voila! It really is that simple!
This project took under an hour for us to do from start to finish and only cost under $10 each! I LOVE these DIY curtain rods. They add the perfect touch of natural elements and texture, and it’s so fun to know we designed and made them ourselves! This is definitely one of my favorite home DIY projects to date (along with my hallway mural).

DIY Curtain Rod Options and Notes:
- Stain or Paint the Dowels – I opted to leave the natural light wood color for our curtain rod dowels. I paid close attention to the dowels when I bought them, and picked ones that had the graining and details I liked. However, you could drastically change the style of these curtain rods by adding stain or paint!
- Use Metal Poles Instead of Wood Dowels – If you wanted to go for a more industrial style, you could use metal poles instead of wood. That would give a nice contrast against the leather and create a totally different vibe.
- Add Finials! – I liked the simple design of the basic dowel and leather strip, however, you could add finials to the ends of the dowels to give these curtain rods a completely different flair. There are so many options out there, the possibilities are truly endless!
- Change the “Nail Head” Color – I initially wanted metal screw caps, but they didn’t have them when I was at the store, so I bought black screw caps instead. I made it all of a week before I opted to paint them to make it look like a nail head through the leather. I grabbed a gold Sharpie paint pen and colored it on to give my faux nail head a little extra pop. There are different options for screw caps that you could buy, or you can use my favorite DIY tool (paint) and make them any color you want!
- For Thick Curtains / Curtain Rings / Grommets – You may need to use a spacer to allow your curtains to open and close without rubbing/scraping against the wall. I added blackout curtains with rings in our bedroom and just added a small piece of wood between the leather straps and the wall to act as a spacer. I would add at least 1-2″ to give you enough space between the curtain rod and the wall.