Oiling your sewing machine is an important part of maintenance that can help keep it running smoothly and extend its lifespan.
Sewing machine oil helps the machine’s parts move smoothly and prevents rust and corrosion. It can help keep your machine in top condition. Not only does it help reduce wear and tear on the machine, but it can also prevent annoying squeaking noises and keep your stitches looking neat and even. See how to do it quickly – and like a pro!
The exact spots for oiling your machine model are not the same in all machine models. Below I show you to how I oil two different machines, and the typical spots to put oil on a sewing machine.
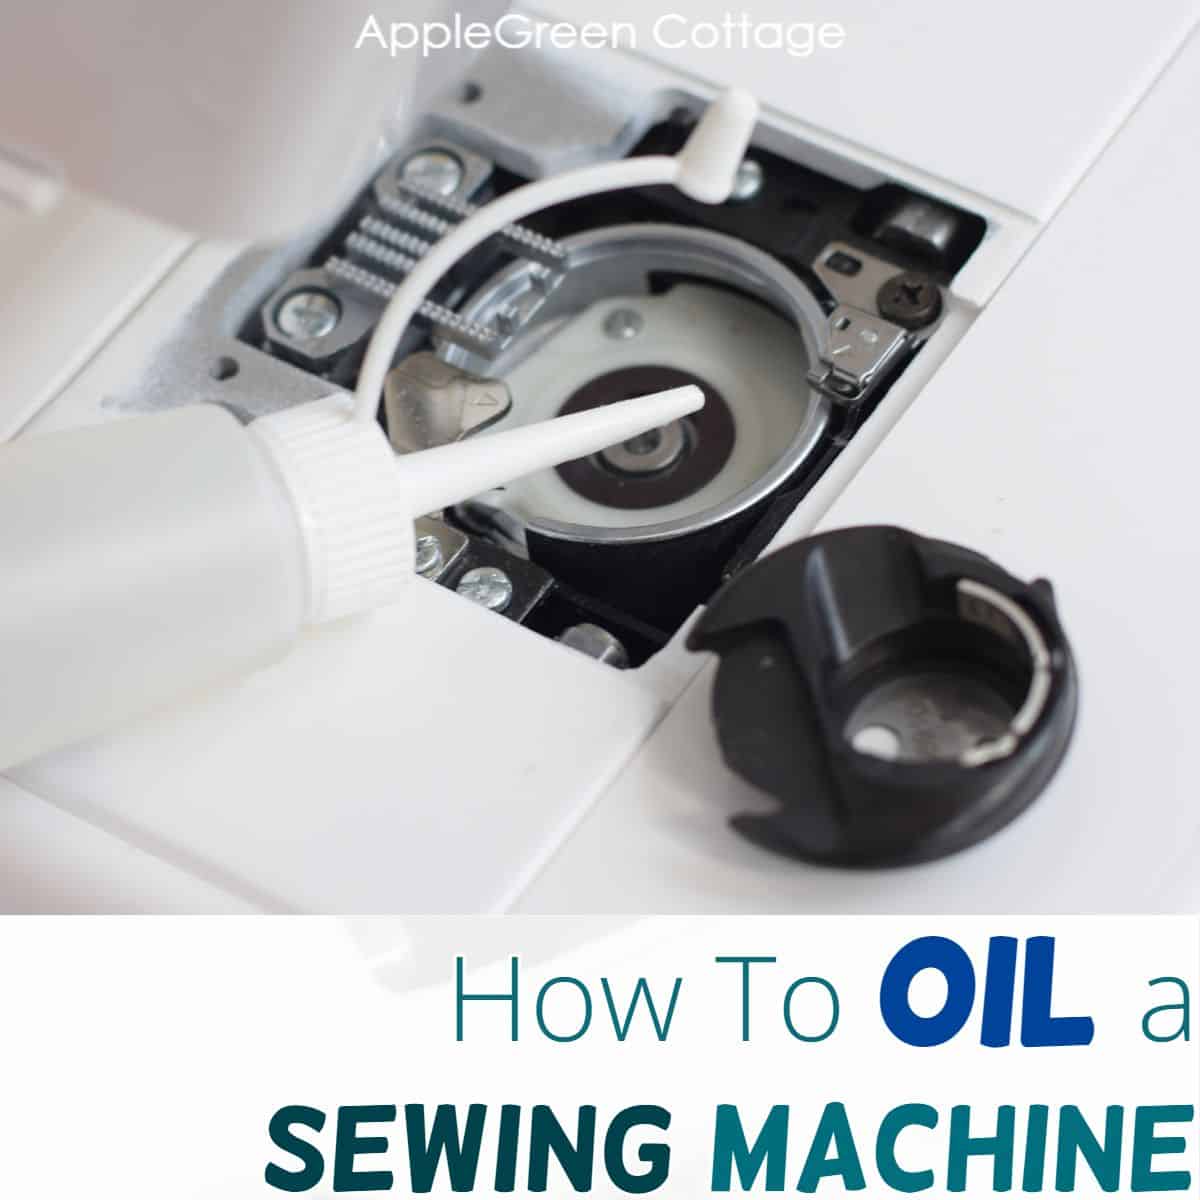
Table Of Contents
- Oiling A Sewing Machine
- Safety first in oiling your sewing machine
- Which parts of a sewing machine need oiling?
- How to Oil a Drop-In Bobbin Sewing Machine
- How to oil a front-load bobbin machine
- What oil to use for oiling a sewing machine?
- How often do I need to oil my sewing machine?
- How much oil do I need to put in the sewing machine?
- I don’t have my machine manual.
- Want More From Learn To Sew Series?
Quick-Fix Sewing Mistakes – Beginner Guide
Stop Sewing Mistakes – Grab Your Quick-Fix Guide Now! ✂️
→ FIX 10 Sewing Issues FAST
Before you begin to oil a sewing machine, make sure it is clean – otherwise clean your sewing machine first to remove any lint.
NOTE: Also check your sewing machine manual for any specific oiling guidelines. This is because every sewing machine has specific oiling points that are not the same with all machines. Please note that oiling a sewing machine is not needed on some modern sewing machines.
Oiling A Sewing Machine
In short, here are some simple steps to follow when oiling a sewing machine:
- Unplug your machine for safety reasons.
- Check your sewing machine’s manual for specific oiling instructions and the type of oil to use.
- Apply a drop or two of oil to the recommended parts. Below I show you the most common part to oil on two sewing machine models.
- Wipe off any excess oil.
- Turn the handwheel a few times to distribute the oil.
Safety first in oiling your sewing machine
Always unplug this sewing machine from the electrical outlet when removing any covers, lubricating your sewing machine, or when making any other adjustments that require removing any part of the sewing machine.
Which parts of a sewing machine need oiling?
It is important to follow the manufacturer’s instructions for oiling your specific sewing machine model. That being said, the typical spots for lubricating your sewing machine are the moving parts on the machine, most often
- the hook race (that’s the housing unit that the bobbin case sits in)
- the top needle bar
The most typical spot that needs oiling on a sewing machine is the hook race – this is probably why you are here. The hook race is a part of the sewing machine that holds the bobbin and helps create stitches by catching the thread from the needle and the bobbin. It’s located under the needle plate and needs to be kept clean for the machine to work properly.
With modern machines, most of your oiling will be just a drop in the bobbin race. Some modern machines are self-lubricating, and won’t need any oiling at all. Again, check your Sewing Machine User Guide manual.
How to Oil a Drop-In Bobbin Sewing Machine
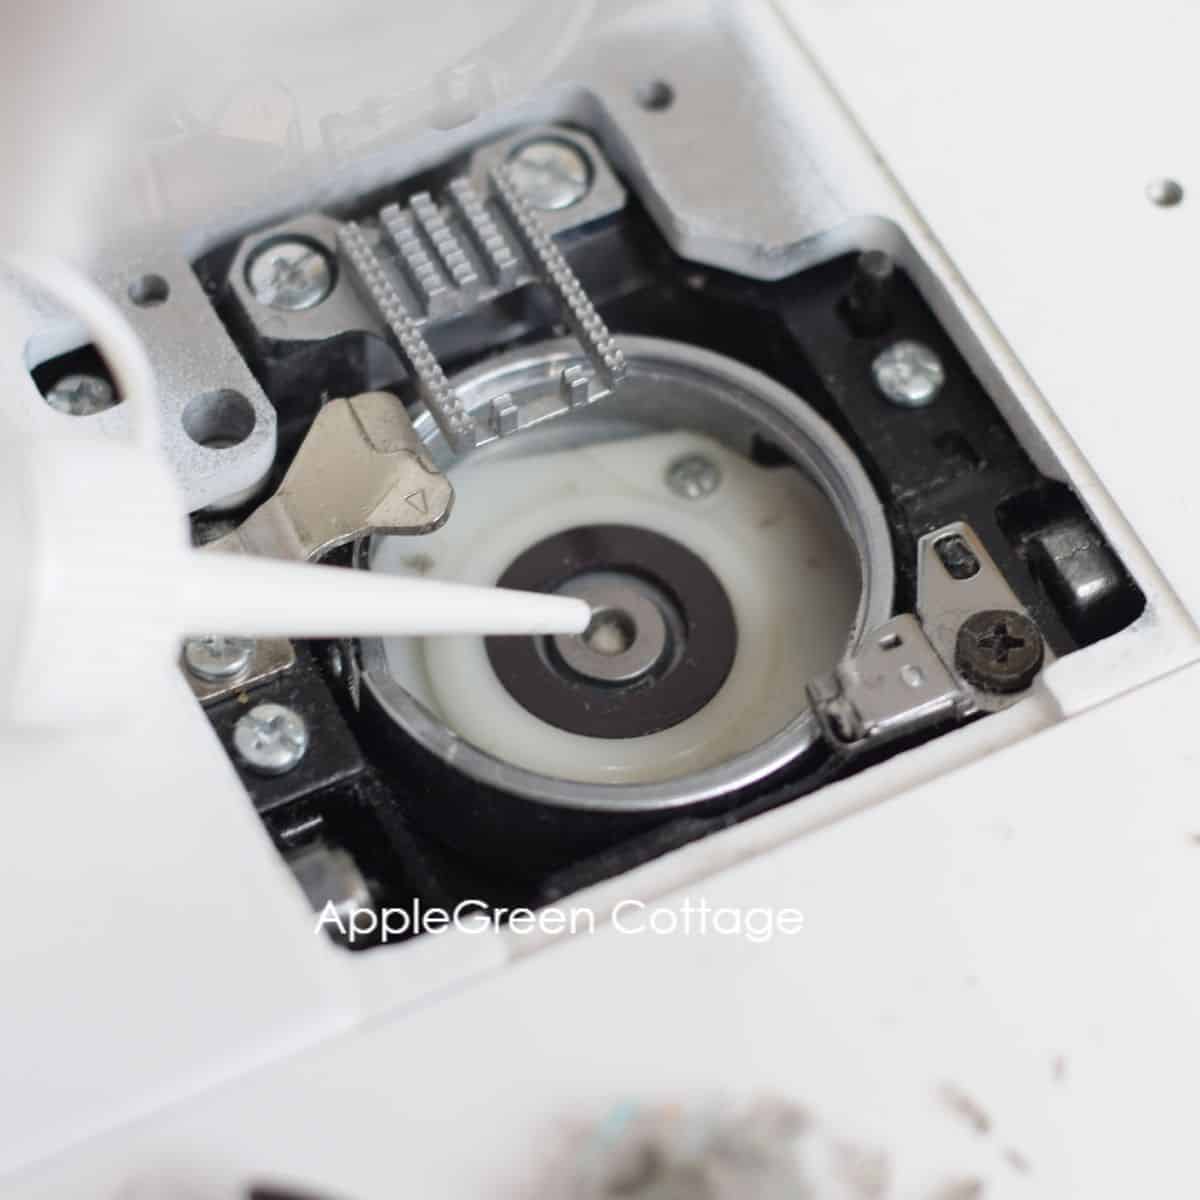
This is for you if you have a drop-in bobbin on your machine. Most modern home sewing machines only need a drop of oil placed on the wick that sits under the bobbin case. I’ll show you here how it’s done.
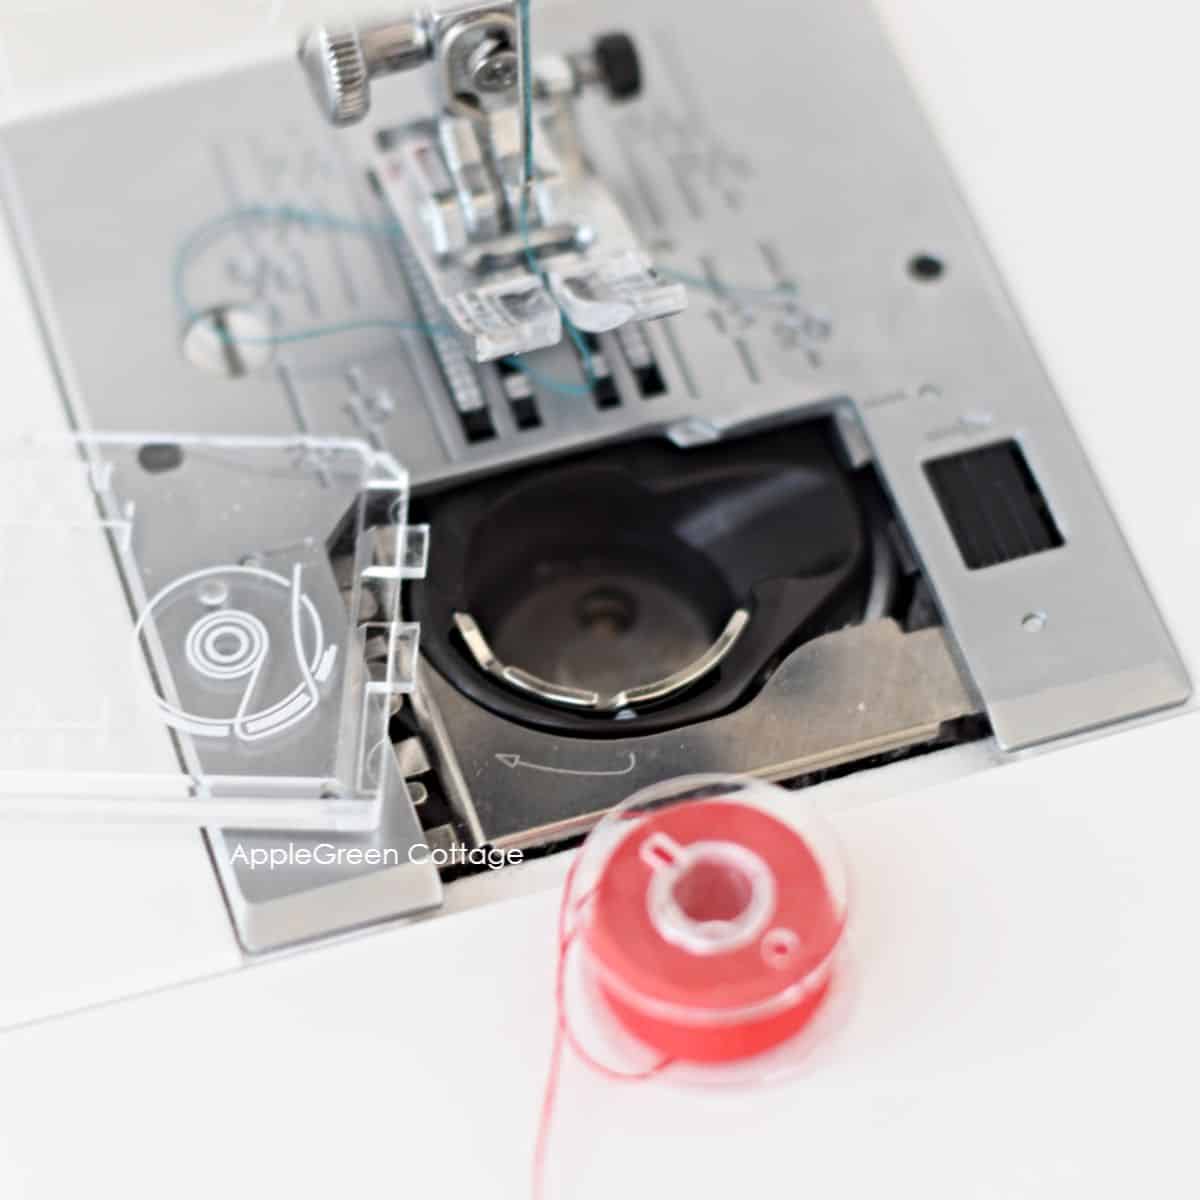
So, on a machine like this, I’m just going to have a drop of oil down in the wick:
But first, you’ll need to unplug, open, and clean your sewing machine. Detailed photos and steps are in the tutorial on cleaning a sewing machine. So,
- Remove the needle plate & bobbin. And, bobbin case.
- Make sure you’ve cleaned all of the dust out from the bobbin case itself and the whole base plate area.
- Place a drop of oil placed on the wick that sits under the bobbin case.
- Reassemble the bobbin and needle plate area, foot, and insert a new needle.
Some machines like mine will have a little oiling hole in the bobbin case so in general, you would not even need to remove the bobbin case to oil the machine – the hole sits directly over the wick. However, I recommend cleaning everything first, not just oiling a dusty machine. So you’ll have the bobbin case removed anyway.
How to oil a front-load bobbin machine
And the older the machines are, they may have some oiling ports up on the top. My Elna machine is not old actually, but it does have a front-load bobbin. This is how I oil it:
Step 1 – Unplug and remove the bobbin case:
Remove the toolbox, open the bobbin housing latch, take out the bobbin and the bobbin case pieces, as shown in the machine cleaning guide.
Step 2 – Clean the machine
See my machine cleaning guide. It will also show you how to open, remove the bobbin case and clean the bobbin space area. Now finally, we’ll oil the machine:
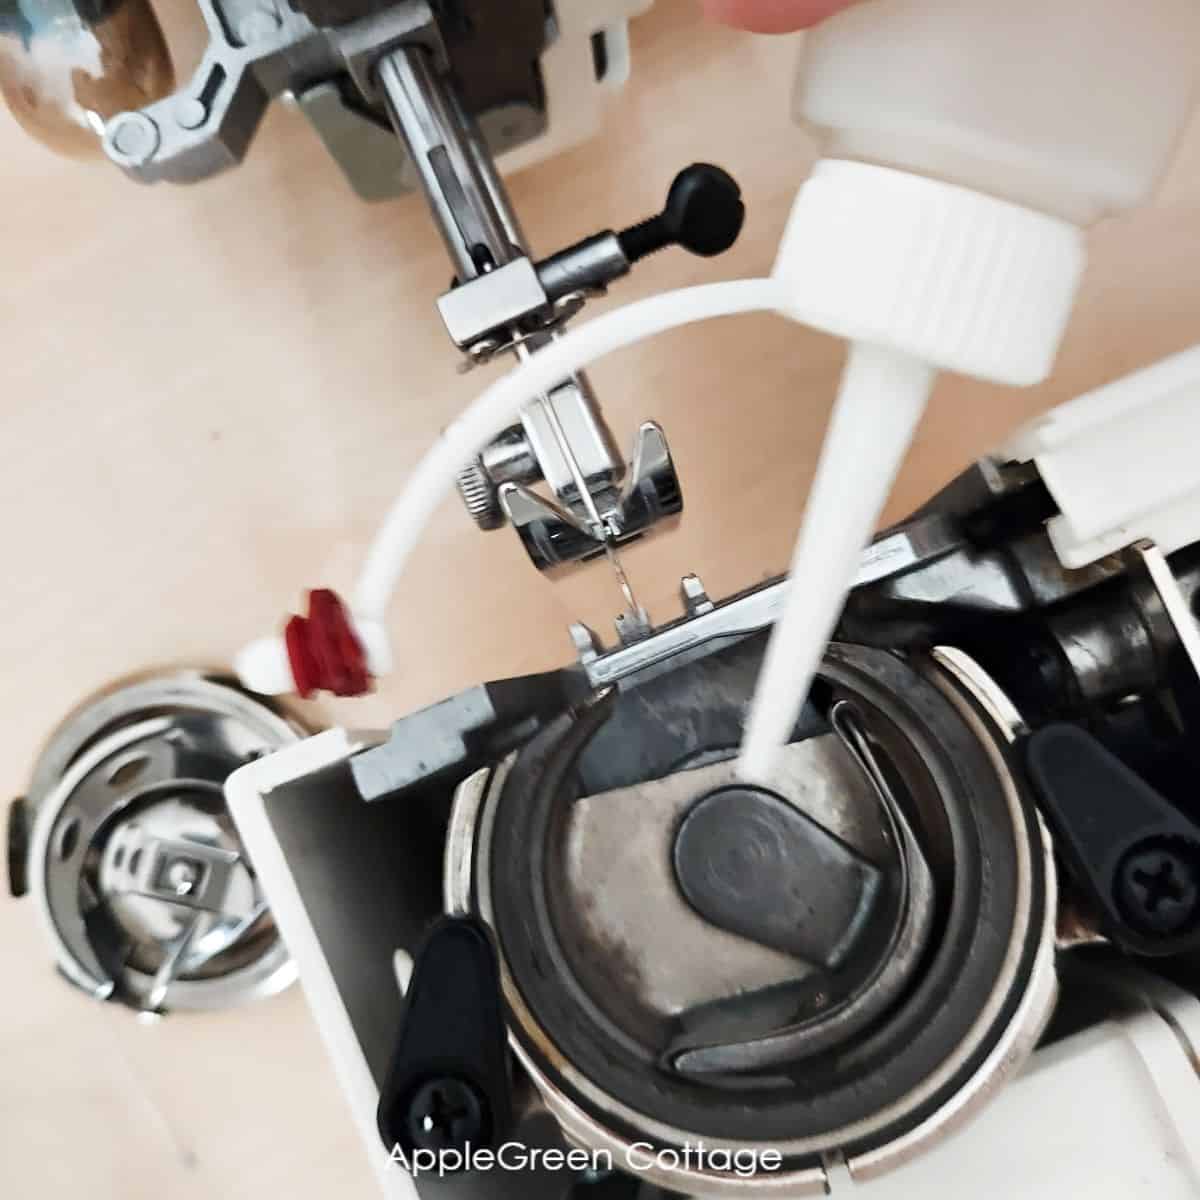
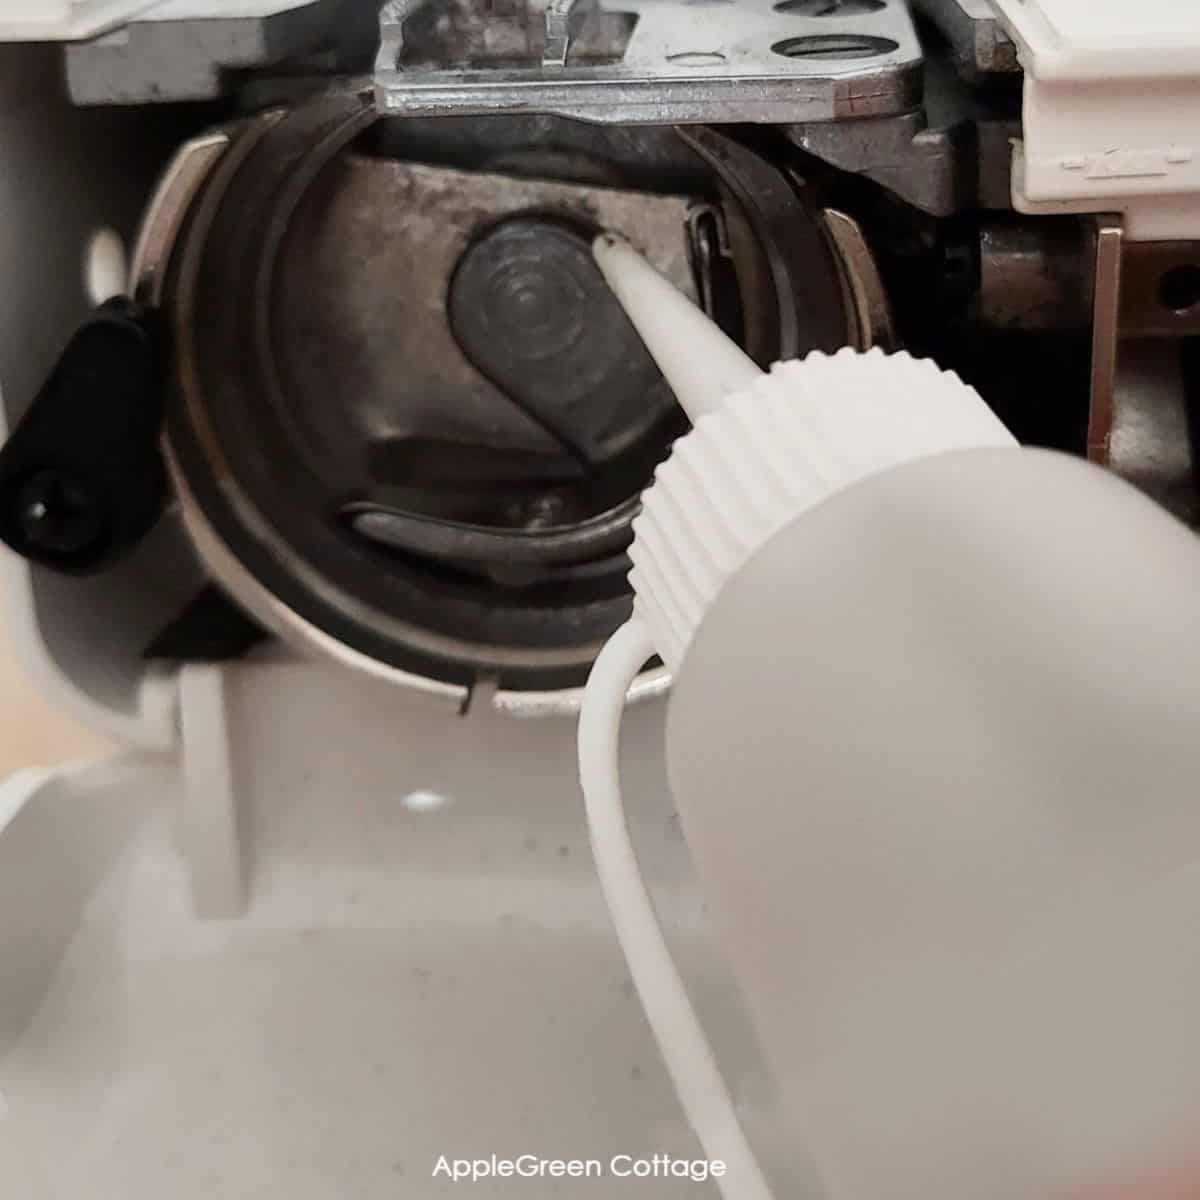
Step 3 – Oiling
After you’ve cleaned and ’emptied’ the shuttle race, it’s time to oil it.
 The exact spots for oiling your machine model will be listed in your machine manual. They are not the same on all machine models.
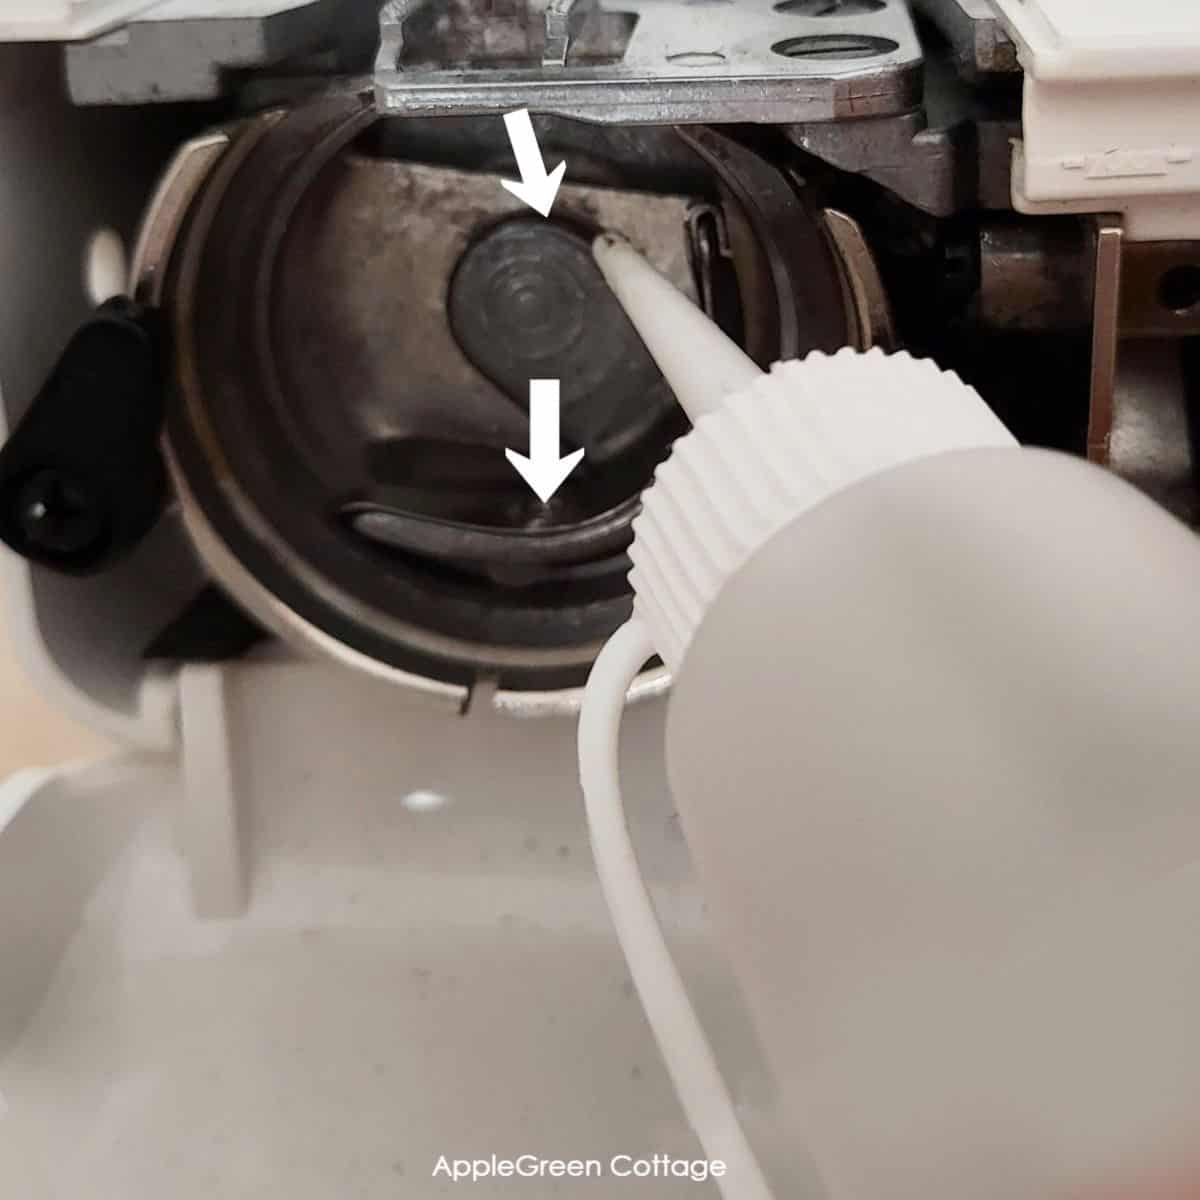
- I always put one drop of oil on the rim of the shuttle hook where the bobbin case sits on.
- I also drop some oil on the hand of the shuttle driver – this is the rotating metal piece that remains in the machine once we’ve removed all bobbin pieces. This is a round piece that is attached to the machine in the center. Oil will reduce friction between moving pieces.
- and third, (not pictured) this machine also requires oiling the top of the needle bar. To oil the needle bar, you’ll need to open part of the housing, called the face plate.
Open the face plate by removing a screw, sometimes there are no screws and you don’t need a screwdriver. Instead, simply push to open a hinge, like this:
To determine whether or not you need to oil the top of the needle bar, refer to your sewing machine instructions.
What oil to use for oiling a sewing machine?
Look for high-quality, clear sewing machine oil, specifically designed for sewing machines, like Singer sewing machine oil. Avoid using household oils like vegetable or motor oils, as they can cause damage to your machine and leave a sticky residue. Do not use grease, do not use WD-40.
Why not use WD-40 for lubricating sewing machines?
WD-40 is not recommended for use on sewing machines because it is not a proper lubricant for delicate machinery. WD-40 is a water-displacing spray that is designed to penetrate and displace water, rather than lubricate machinery. It contains solvents, which can dissolve or damage some plastics, rubbers, and other materials commonly found in sewing machines.
How often do I need to oil my sewing machine?
Remember to oil your sewing machine regularly, as recommended by the manufacturer, to keep it running smoothly and extend its lifespan.
If you’re sewing every day, you’ll oil weekly, or every few bobbin changes. If you’re a hobby sewist, or only sew on weekends, you don’t have to oil this machine every single week but what I do recommend is at least every couple of months.
However, the easiest, no-brainer way to oil your machine when you clean it. It works for me.
How much oil do I need to put in the sewing machine?
It’s simple: always just a drop or two per spot. It will be enough. Don’t use too much oil because it can cause problems. It can drip on the fabric as you sew, and nobody wants that. Also, too much oil will attract more dust. If you have used too much oil, use a dry cloth to rub away the excess carefully and gently.
I don’t have my machine manual.
If you don’t have the instruction manual, you can try to search for it online or contact the manufacturer for assistance. Some manufacturers also provide instructional videos or diagrams on their websites that can help you apply oil correctly.
If I oil my machine at home, is regular servicing even needed?
Every couple of years you should definitely take your machine in for a full service at the local dealership that handles your brand machine. What I showed you above is what you can, and should, do at home to keep your machine up and running, and in good condition. But every few years, it’s good to take it for a full checkup and overhaul at the local sewing machine repair shop.
When you take your machine in for a full service at a dealership or sewing machine repair shop, they will typically perform a thorough cleaning of the machine, oil any necessary parts, adjust the tension, and check for any other issues that may need attention. This will help ensure that your machine continues to function properly and that you get the most out of it for many years to come.
Want More From Learn To Sew Series?
Quick-Fix Sewing Mistakes – Beginner Guide
Stop Sewing Mistakes – Grab Your Quick-Fix Guide Now! ✂️
→ FIX 10 Sewing Issues FAST
Did you like this sewing guide? Here’s more from the sewing tips series:
- the master guide for learning to sew
- What are the Must-Have Sewing Tools?
- Sewing terms glossary
- Beginner sewing tips you’ll need to know if you sew.
