
Our Painted Bedroom Furniture
Welcome back, dear friends! I baked instead of worked this weekend and it was so worth it ha ha! So today, I’m sharing our painted bedroom furniture and bedroom makeover!
While most of our minds are on the holidays at the moment, January is often when we start looking at our home as the the decor comes down to see what we can do to change things up, and this post is the perfect motivation you might be looking for!
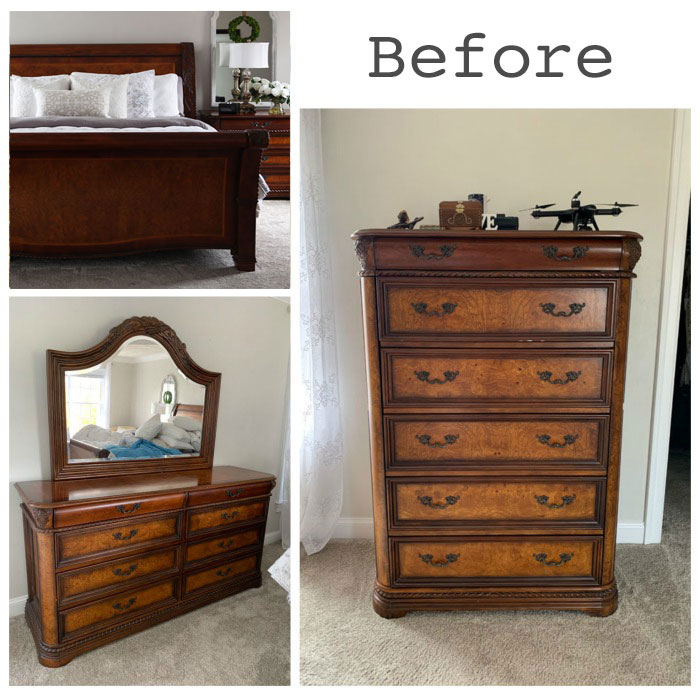
Here is our bedroom furniture set before:
I was originally planning to purchase new furniture for our bedroom. Then, I started pricing new bedroom furniture. When did furniture get so dang expensive?? I guess that’s what happens when you thrift for most of your furniture lol.
Instead of shelling out several thousand dollars for a new set, I was willing to try painting our exisitng set. I wasn’t convinced I would love it painted at this point, but for less than $100, I was willing to give it a go.
Painting our Sleigh bed
I started on day one with just the bed, in hopes that we would be able to sleep in it that night.
Here is the bed before:
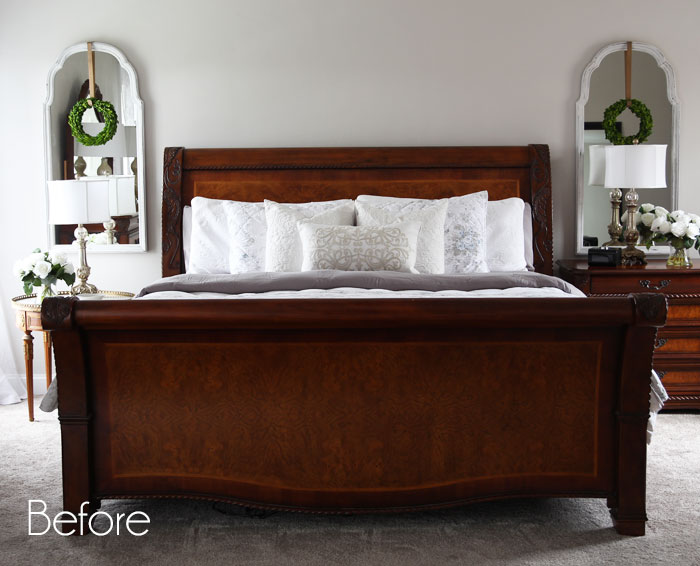
This set belonged to my husband. He had just purchased it not long after we started dating. The set I had only had a queen-sized bed, so that set went to Jack. I have never been a fan of this one because it’s very masculine.
Because I was saving thousands of dollars, my hubby gave me the go ahead to paint. (The color in the photo below is more accurate.)
I thought painting this bed was going to be such a huge undertaking, but it really wasn’t bad at all. I’ve included a few affiliate links so you can find the products I love.
I used Dixe Belle’s Fluff to paint, and this is after only ONE coat!
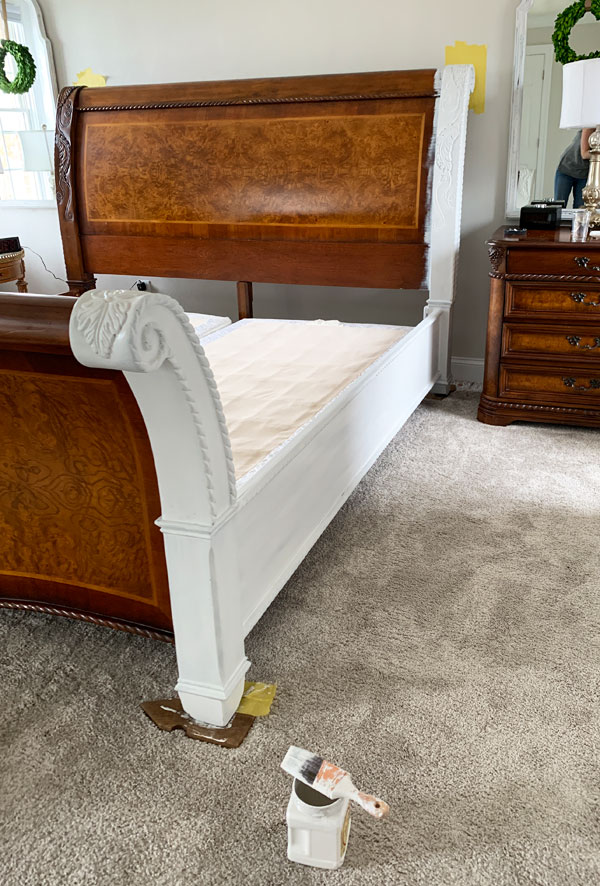
Fluff is more of a vintage white than a stark white so it usually covers completely in just TWO coats. I love that!
If you’re a messy painter, you may want to bring out the dropcloths, but I paint so much that I have lost the fear of making a mess. I just keep a wet washrag on hand nearby.
And because this was a newer set, there was no worry of bleed-through, so I was able to skip prepping with BOSS and get straight to painting!
**With chalk paint there is no need to sand first either…just clean well with White Lightning, rinse, and paint!
I used a brush to apply the paint. My favorite is the 2″ Mini Angle brush by Dixie Belle.
Sand
I sanded lightly all over with 220 grit sandpaper wrapped around an old sanding sponge to smooth out the paint and distress all the pretty details. Then I vacuumed up all the sanding dust with my shop vac.
Seal
I sealed with Clear Coat in Satin using the blue sponge applicator, and this bed makeover was complete!
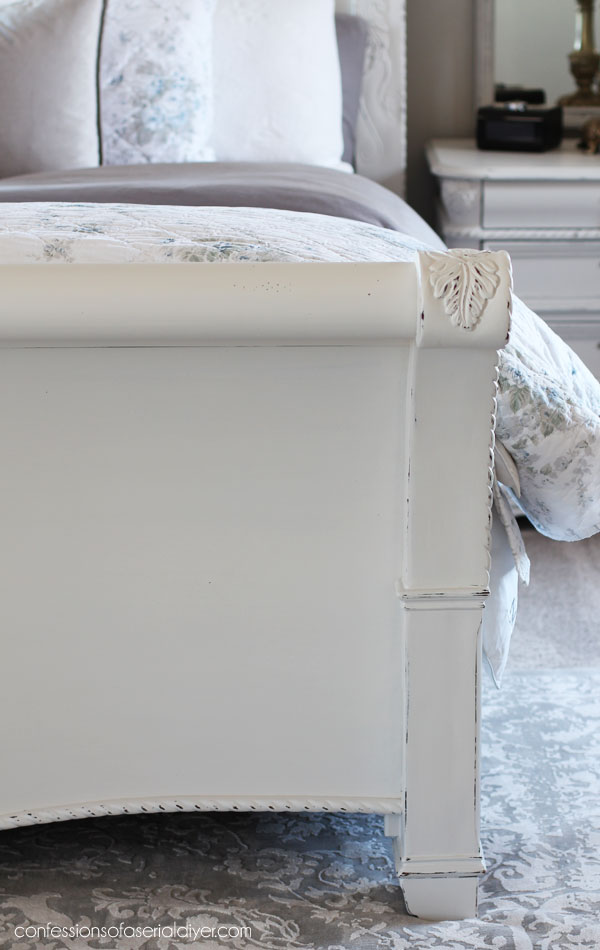
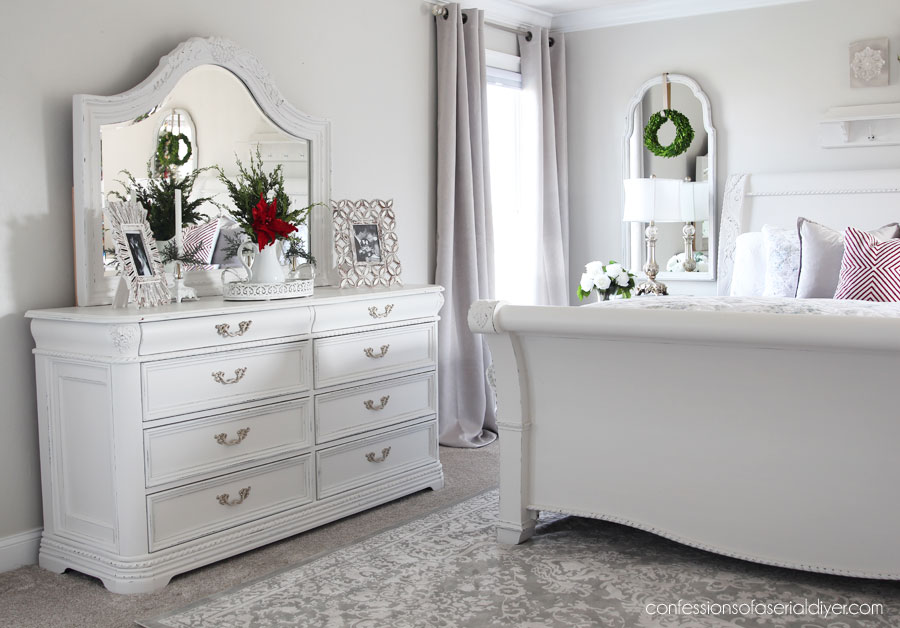
Meet our brand new sleigh bed:
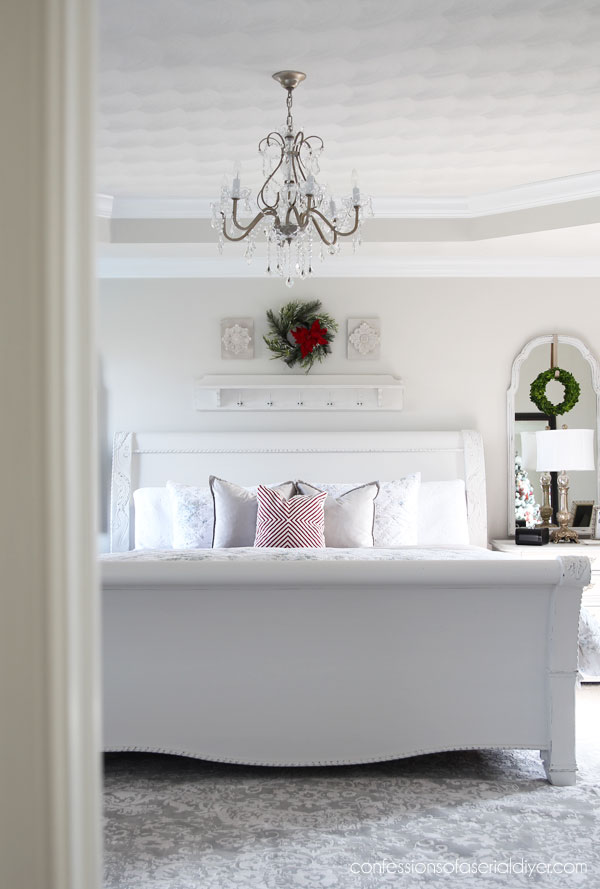
So light and bright and lovely!
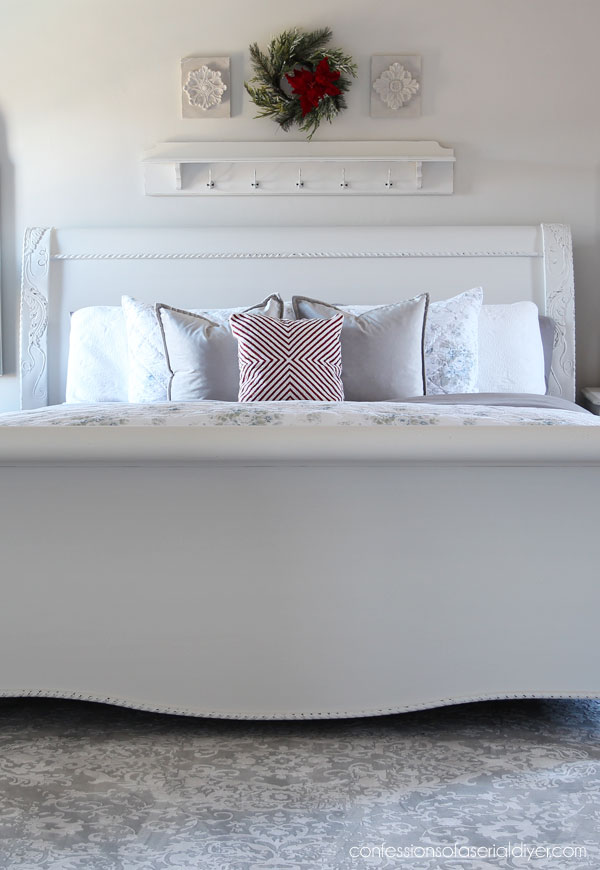
It doesn’t even look like the same bed!
FULL DISCLOSURE: I did not pull the bed out from the wall to paint the back of the headboard. Shhh…that is our secret ha ha!
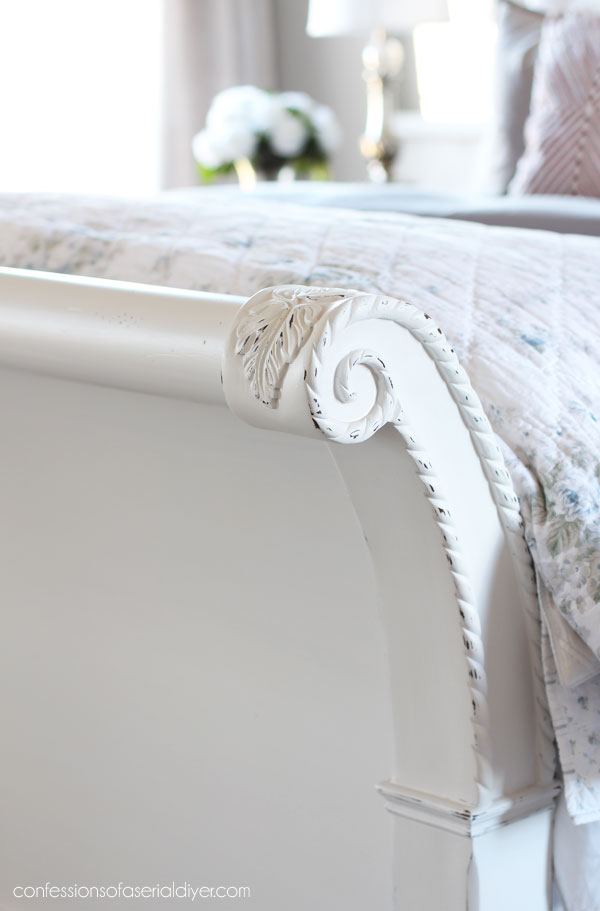
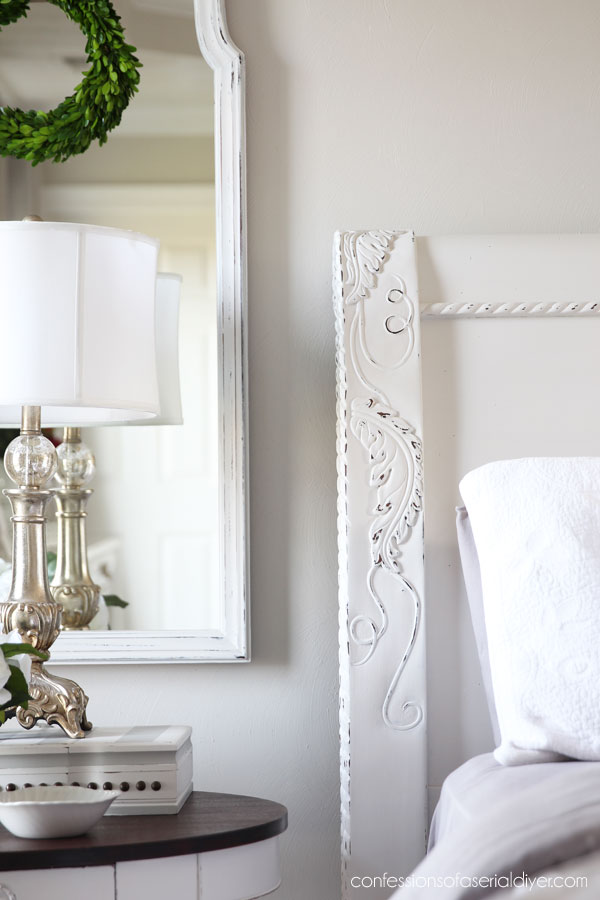
Ooh hello, pretty details!! I could hardly see you there before…
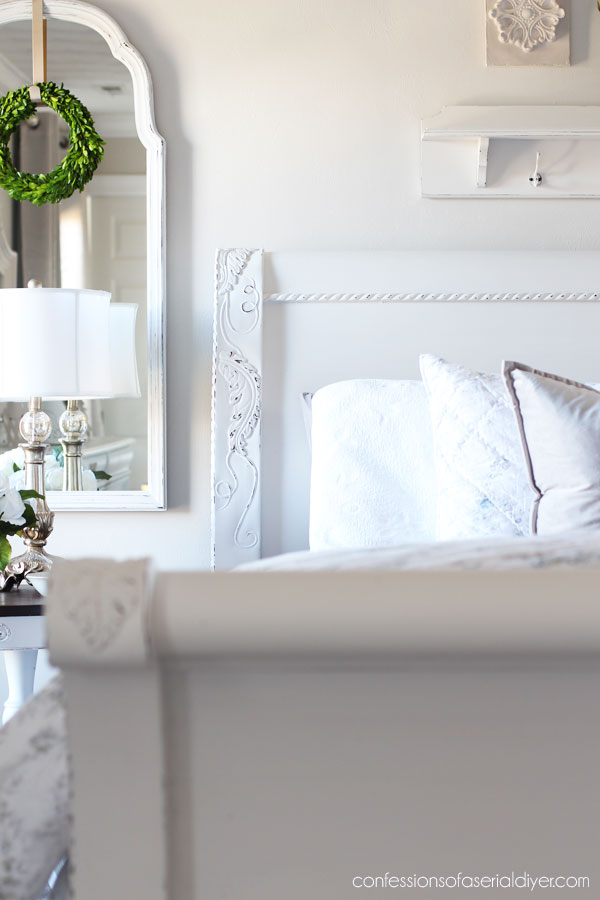
I love those pretty curves so much more now that you can really see them. You can also see the lovely sheen that the Satin Clear Coat leaves behind…
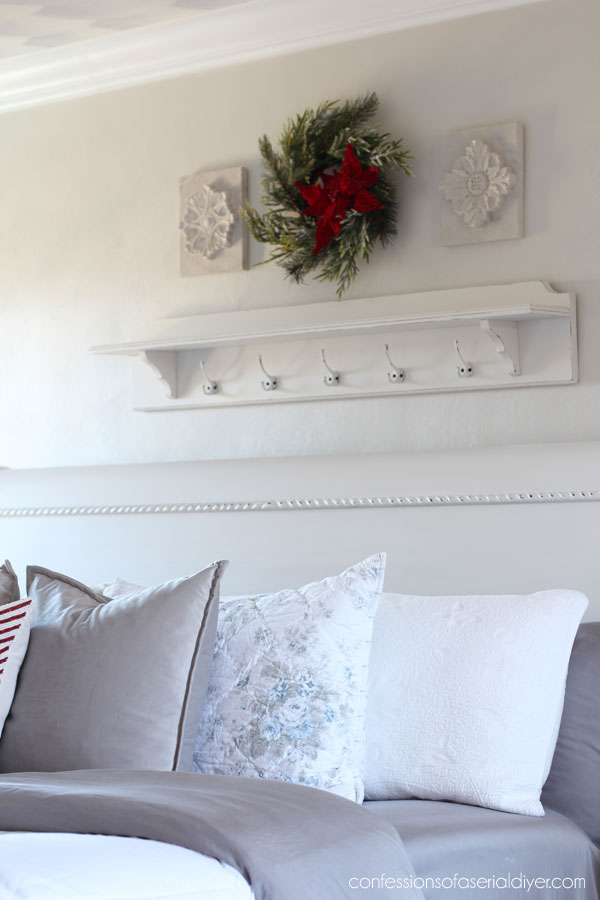
The shelf above the bed was made from my Hubby’s grandmother’s foot board that I repurposed in this post.
I thought it would be fun to decorate, but instead, I just use it as a space filler.
My $4 mirrors that I redid are actually what started this whole room makeover, and they work great in here on either side of the bed.

The bedding came from Target several years ago.
You can find the rug on Amazon HERE.
The dressers and night table were painted the exact same way.
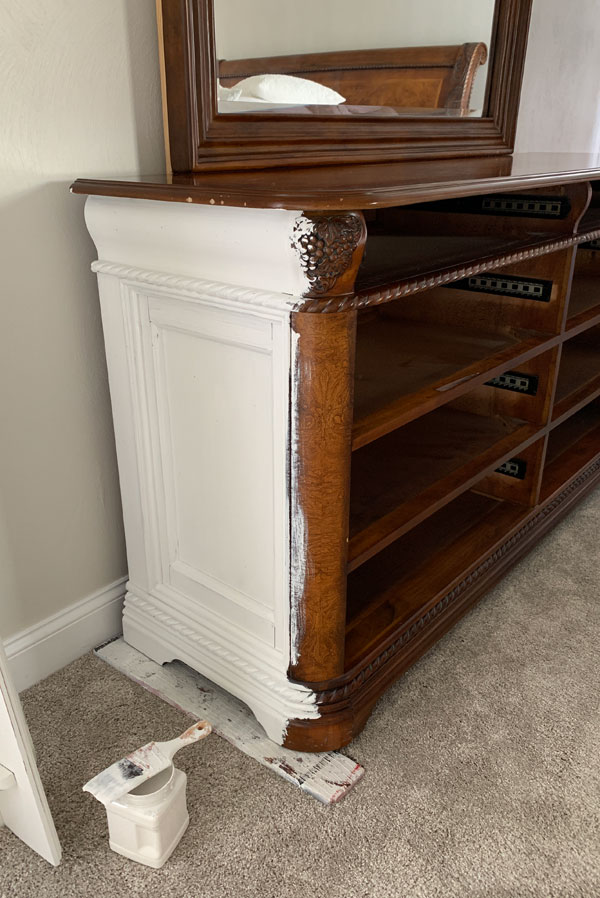
When I say this color of white has excellent coverage, I’m not kidding!
Here’s more proof!
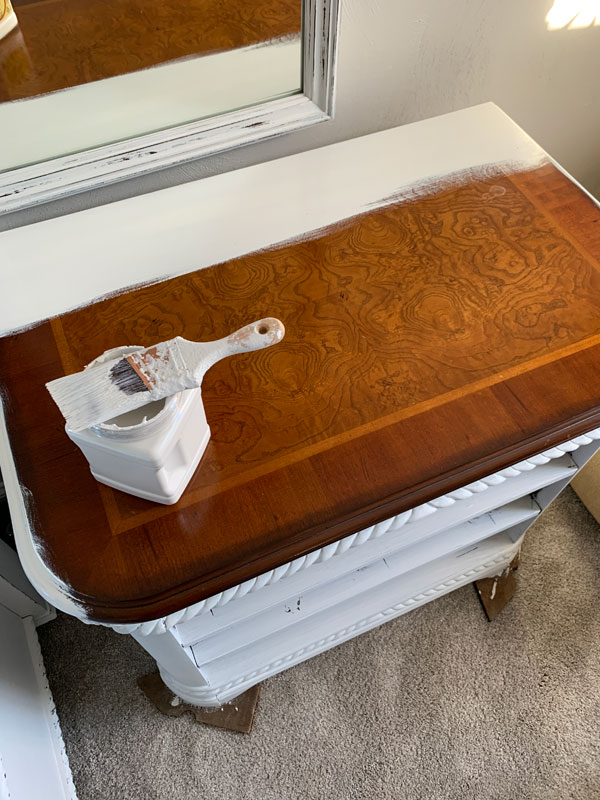
The night table and dressers were painted the very same way as the bed.
I didn’t get a full-on photo of the night table, but you can see it below.
There was only one, so I brought this drum table up from my office for my side of the bed:
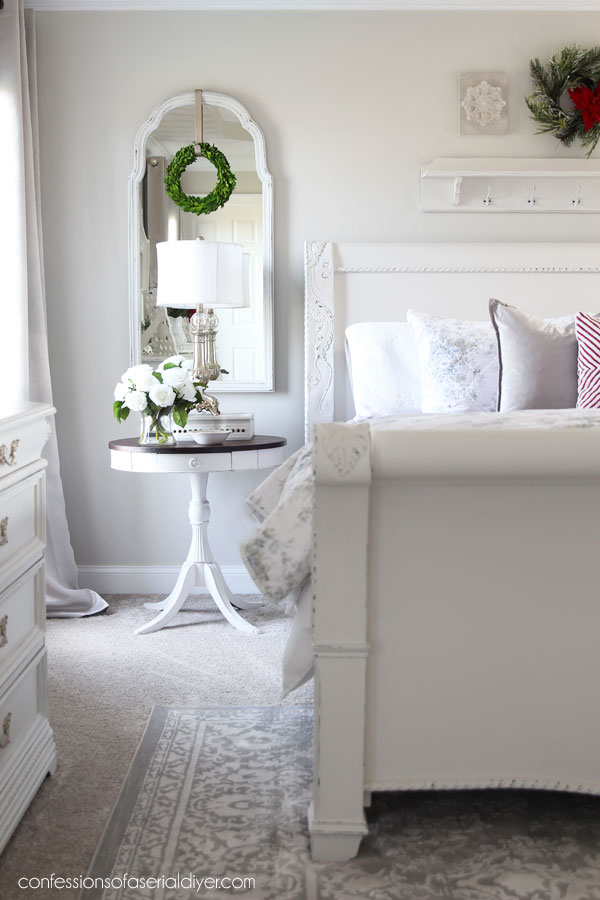
It had already been painted in Fluff previously, so it fit right in!
This is the night table that I was using before, but I couldn’t bring myself to paint it at the time. Plus, it was a little on the short side…

It got a metallic makeover that you can see HERE, and it now lives in my office.
Dresser #1
Here is my Hubby’s dresser before:
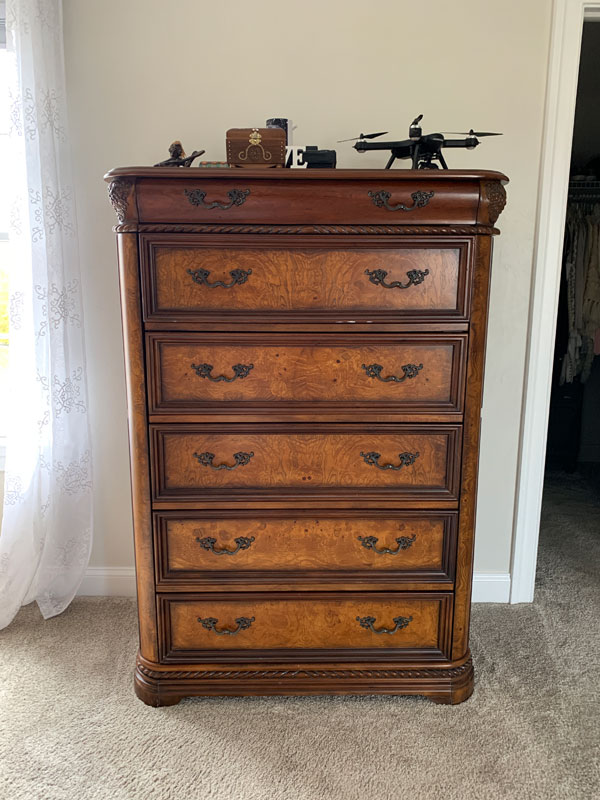
If that decor doesn’t scream bachelor ha ha.
And after…
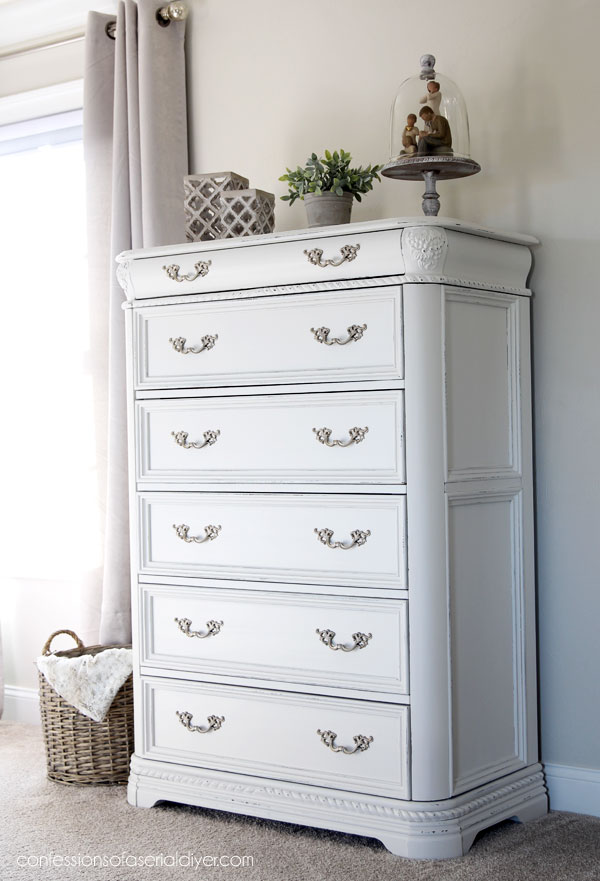
I found a few new things to redecorate when I was redoing this room, so no more bachelor decor.
He honesty doesn’t mind what is on there.
Dresser #2
Up next is my dresser.
Here is the before:

Can I tell you that I do NOT miss this wood at all??
Look at how those moulding details come alive in the lighter color!
And after that paint magic:
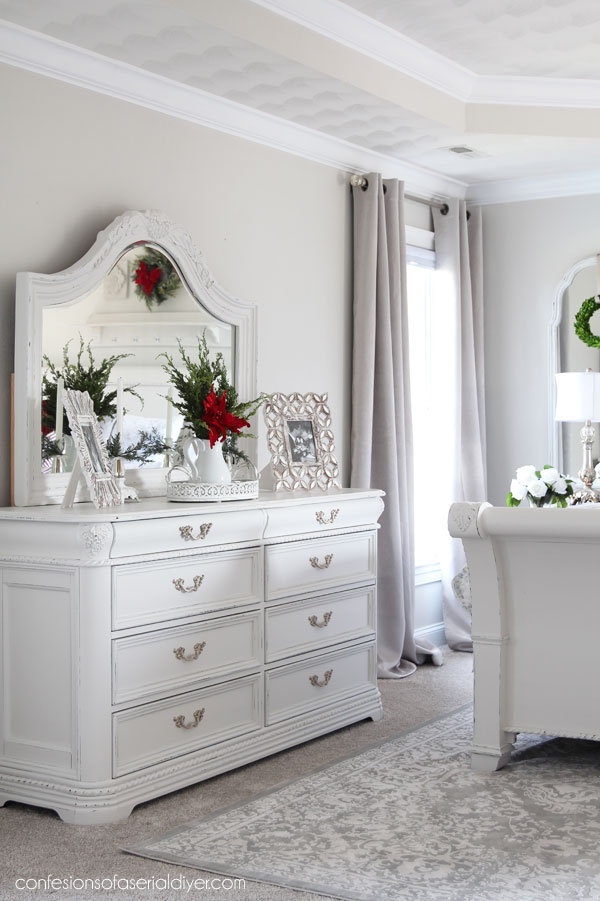
I love you, paint!! Again, this is Fluff by Dixie Belle, and I just love it!
I never imagined this set could look so pretty!
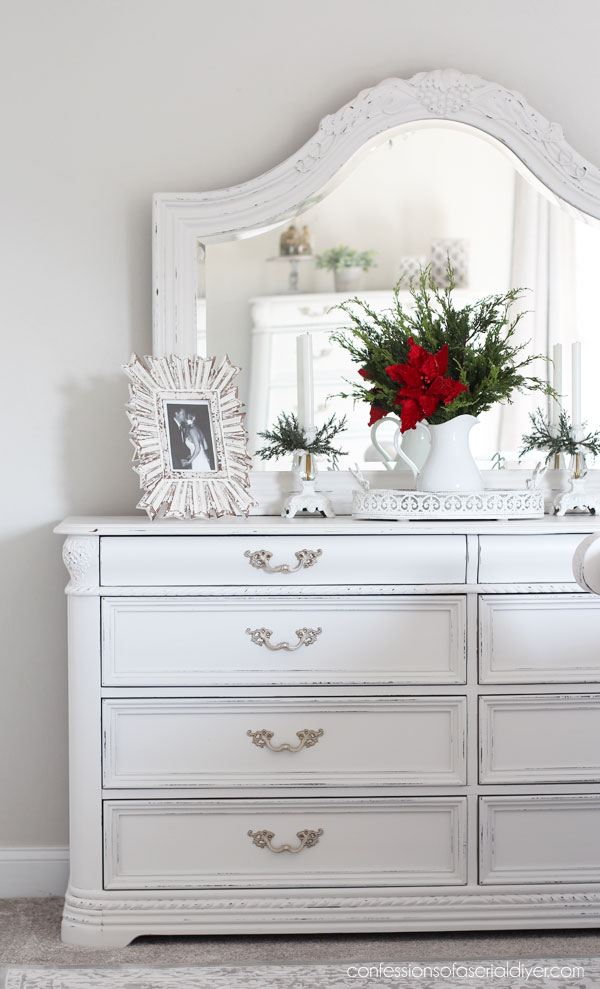
The original hardware is perfect in Rustoleum’s Champagne Mist:
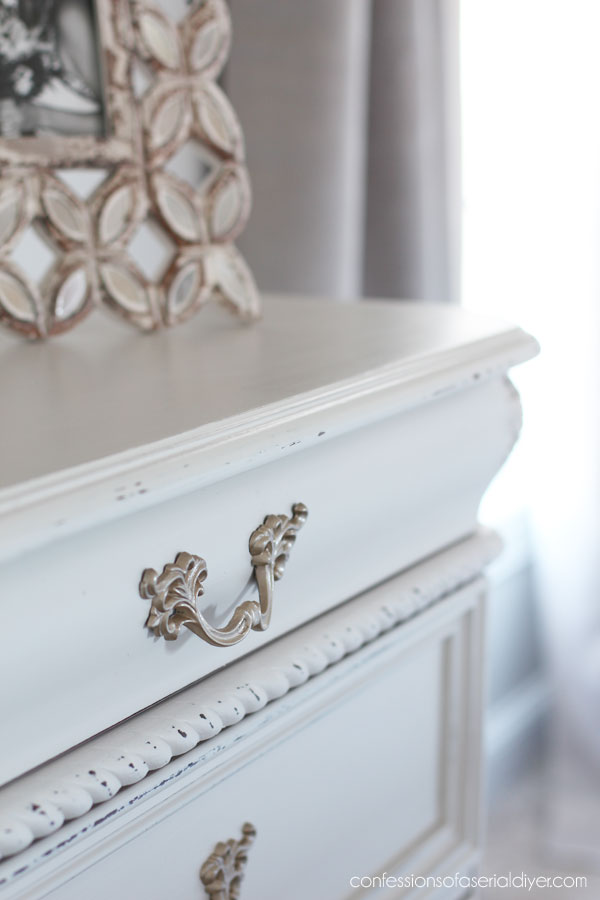
When sealing, I gave the sides of everything one coat of the Satin Clear Coat, while the tops of everything got two coats.
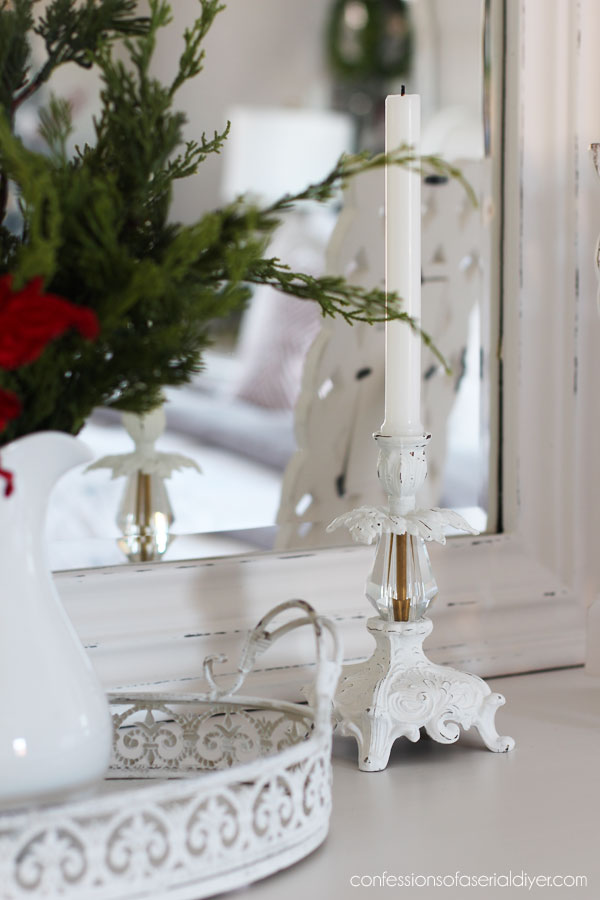
I use these candle holders in my staging often, but this is where they live:
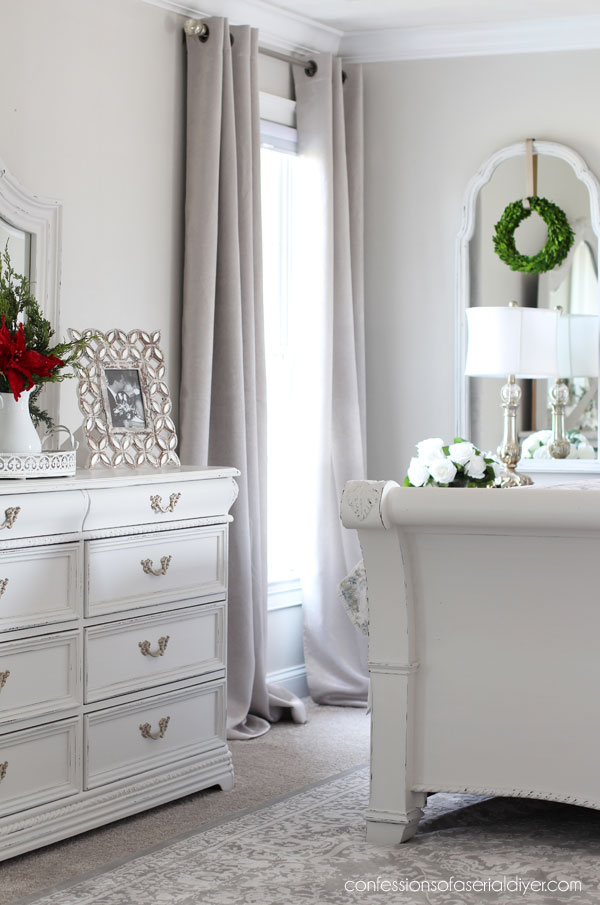
When I was redoing this room, I had found the perfect curtains for $69 a pair, but I just couldn’t bring myself to pay that.
These $30 alternatives that I found at HomeGoods were perfect!
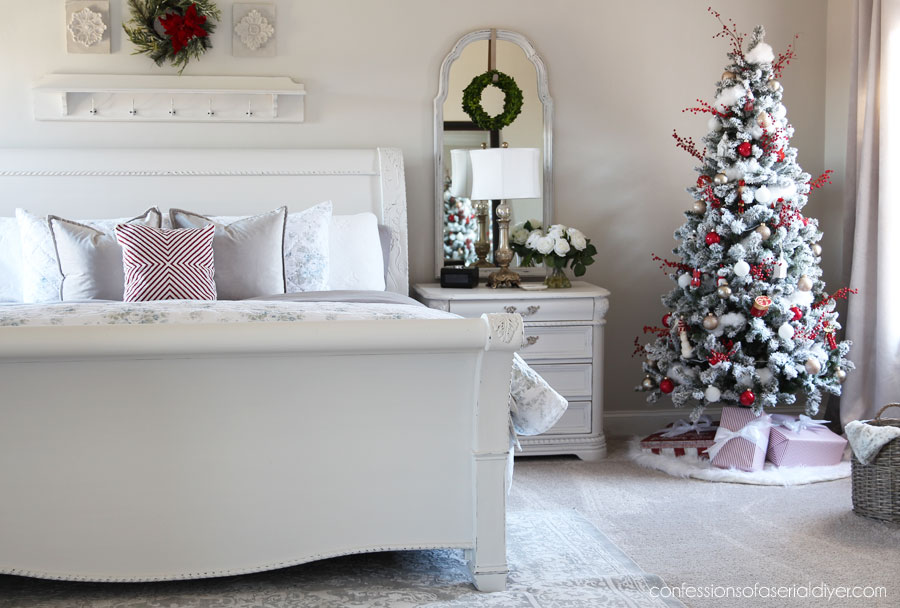
When I was imagining our bedroom furniture painted, I was thinking about how fun it would be to decorate it for Christmas!
I found this flocked pre-lit tree at Walmart for only $79:

I borrowed a tip from my blogging bestie, Nancy from Artsy Chicks Rule, on how to add a snowy look to your tree. (She shares several ideas HERE.)
I added dusters from the Dollar Tree in between the branches:

It kind of looks like snow collected in those places! It does have lights as well, but they were giving off a weird yellow glow in the photos, so I unplugged them.
Here is What I used to transform this furniture:
- Fluff by Dixie Belle {I used two full 32 oz size containers and about 1/4 of another to give two dressers, a nightstand and a king-sized sleigh bed (minus the back) two coats.}
- Dixie Belle Clear Coat in Satin {I used less than 16 oz and applied one coat to the body of the dressers and nightstand, two coats to the tops, and one coat to the bed.}
- Dixie Belle’s blue sponge applicator
As always, get FREE SHIPPING on any orders over $50 in my Etsy shop. No code necessary! Get $8 flat rate shipping all orders under $50.
Find my Step-by-step guide for painting a dresser with just about any issue HERE.
And how about those grapes?
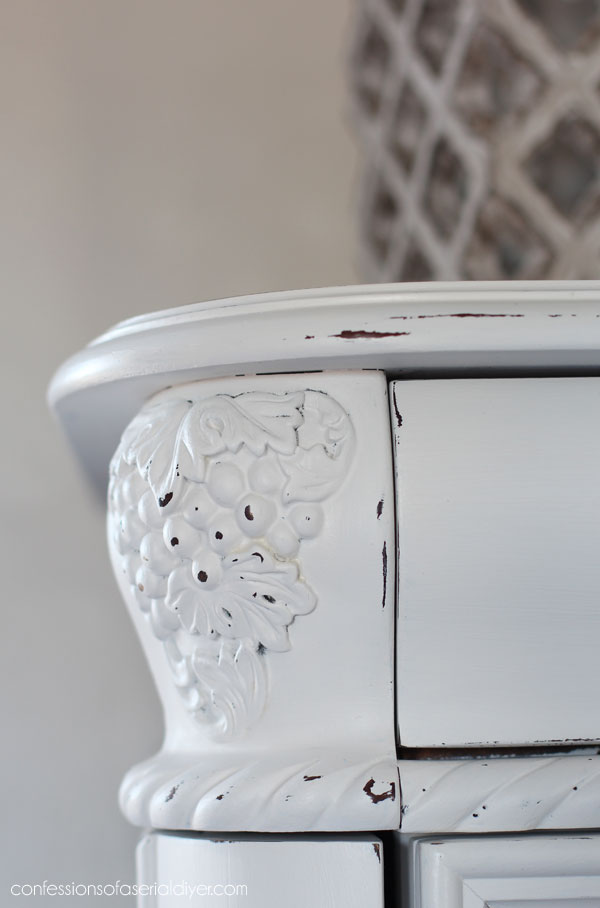
I never understood why this bedroom furniture had grapes on it, but I hardly even notice them now!

And that is our painted bedroom furniture!
Although I wasn’t totally convinced I’d love it, I am so glad I was wrong!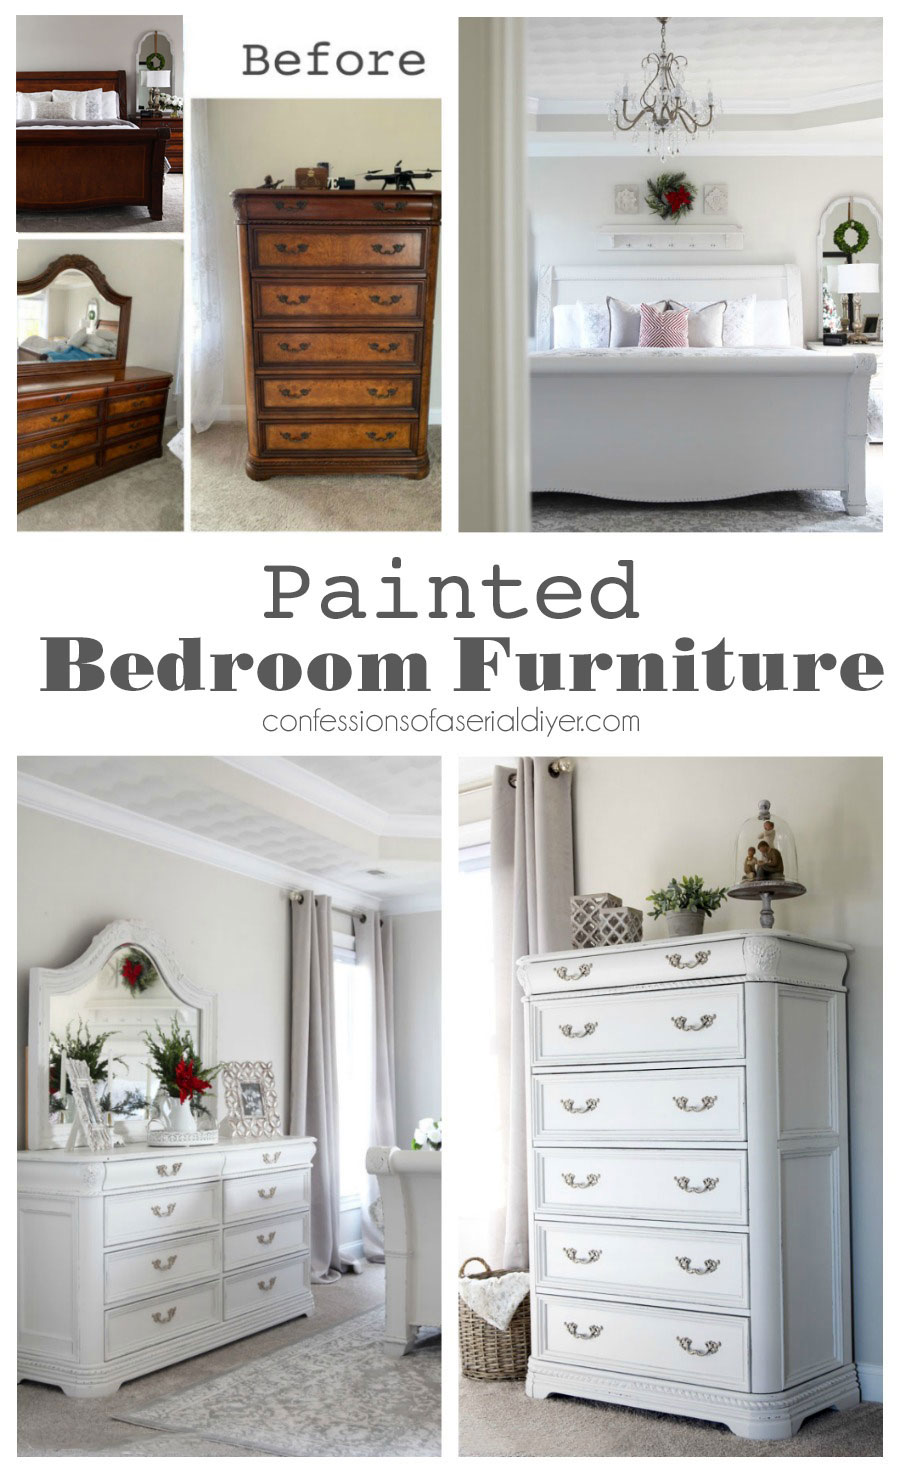 It has been four years, and it still looks as good as the day I painted it!
The most asked question after sharing originally was How does my hubby like it??
He thought it looked too girly before I was finished, but when it was all done, and his mom and sister were raving about it, I think that changed his mind, so he actually loves it now!
I am so thrilled that we were able to keep our existing furniture and turn it into something we both love!