Resizing An Oversized Back-zippered Dress (Tutorial)
A few weeks ago I posted about resizing an oversized side-zippered dress, and promised a tutorial on a back-zippered dress. So today is the day, friends.
I found this dress at Kohl’s a few months ago, and with the holidays approaching, I just had to have it. The only problem was that it was about 5 inches too short. So I bought it about 6 sizes bigger than my normal size (which added enough length at the hem) and then altered it to fit with just a few easy steps.
Also, these pictures are all taken at different times of the day so the shades of red all look a bit different, but it’s really a bright cherry red. The perfect Little Red Dress (also, I wrote on Babble about 5 ways to wear it!)
Keep scrolling to see an easy step by step tutorial to take any back zippered dress in and make it fit like a glove!


________________________
dress: kohls (similar (& 10% cash back right now when you buy through ShopAtHome.com! — if you’re confused, I wrote about using Shop At Home here)
coat: c/o sheinside
heels: c/o sole society
clutch: c/o hello fab
necklace and cuff: c/o inpink (50% off ALL fashon jewelry now thru Dec. 2 with code IPHOLIDAY2013)
Materials:
- oversized dress
- seam ripper
- matching thread
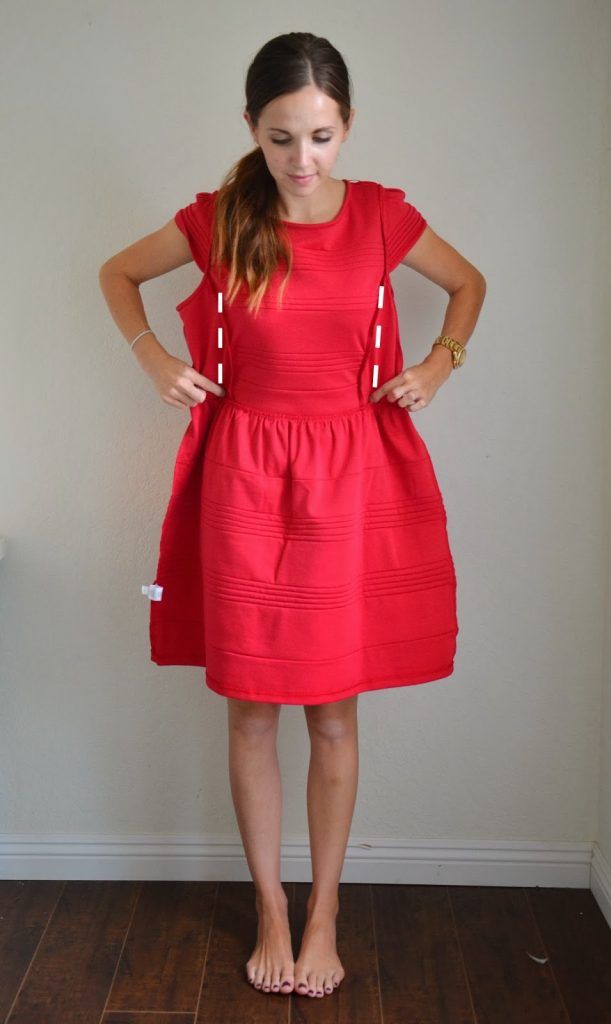
Step 1. Using a seam ripper, separate the bodice from the skirt at the waist, as seen below. The opening you have to create will vary, depending on how much you need to take the dress in. (I had to take in about 6 inches on each side, so my opening was about 7 inches).
Step 2. Try on your dress, inside out, and determine how much you need to take in on the sides. Pin accordingly, and then with right sides together, sew from armpit to waist on each side, taking in the bodice. Trim the extra fabric and zigzag or serge the raw edge.
Step 3. Now let’s take in the sides of the skirt. With right sides together, pin the skirt from waist to hem, but leaving about 4″ of width (this extra fabric will be gathered to match the rest of the skirt — if your skirt doesn’t have gathering, skip this part), and then sew with a straight stitch. Trim the seam allowance and zigzag or serge the raw edge.

Step 4. With the remaining 4″-ish inches you left untrimmed, gather it up and pin in place (or use a basting stitch and pull to gather). Tuck the bodice inside the skirt so the right sides are together, and then sew the bodice back to the skirt, sewing over the gathers with a straight stitch.
Step 5. If your sleeves are too big, use a seam ripper and remove as much of the sleeve as needed (my sleeve was a half sleeve, so it wasn’t attached all way under the armpit. So I unpicked only the back half of the sleeve, as seen below. Then carefully tuck the sleeve farther into the armhole until the sleeve is your desired size.
You can see the extra bit of sleeve sticking out of the armhole below. Sew the armhole back up, and then trim the extra sleeve off, zigzagging or serging the raw edge.*

*For full sleeves, remove the entire sleeve before resizing the bodice. Then, resize the sleeve how you’d like, resize the bodice with the instructions above (making sure to make the armhole smaller in the process), and then re-attach the sleeve.
