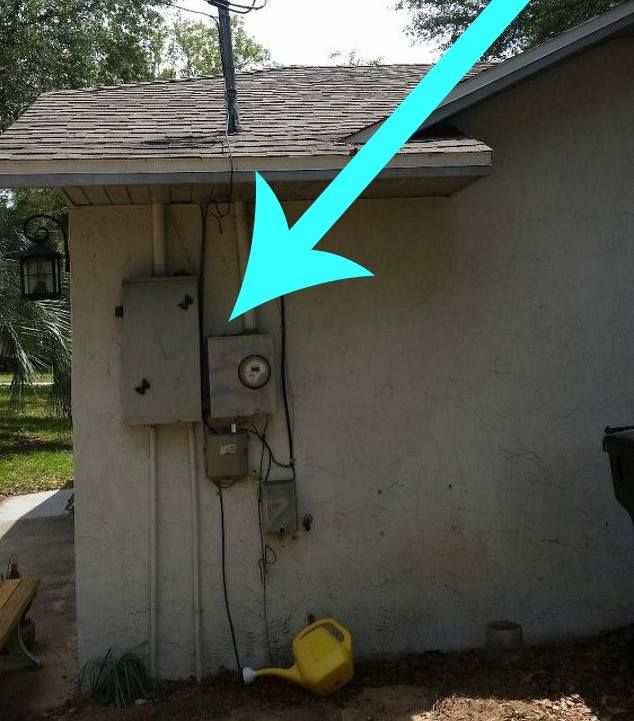
The utility boxes on my house are located on the front, right side. Visible as you’re walking or driving down the street. Just an UGLY sight. Since there wasn’t a practical way to hide them, I decided to use them as a surface for art instead.

Before: UGLY!
I sketched out a simple design. I like birds and knew that I wanted to make that the anchor for the design. I’m artistic, but felt I needed to use a stencil or trace the birds. I used what I had already. A pair of metal bird wall art and a metal dragonfly that I use on my front door. But other than that, I freehand painted as I went along.

Used these metal bird wall art as “stencils”.
I traced the birds and dragonfly onto the boxes.

Used this metal dragonfly as a filler stencil
I gathered all of my exterior acrylic paints. I used the colors that I have on hand. I blended, lightened and darkened to make the colors I have work for my project.

Notice they are the outdoor type of acrylics.
I started by painting the birds brown and the dragonflies purple’ish….solid. It took a couple coats of paint. I realized that leaves would be a nice filler. I’d originally thought of freehand painting branches. I cut out a simple leaf stencil out of a piece of scrap cardboard. (I don’t have a picture of it, but easy) As the first coat of paint was drying, I randomly traced on the leaves. Then just started layering the colors. I prefer to work with one color at a time. A lot of dots. Big ones, then when they dried, I added smaller on top.

I decided that I wanted more movement, so I added honey bees, then blue dotted swirls.

Ta da! I can’t make the boxes go away, but at least they look better. I might go back and add more color dots inside the leaves.
Note: It was a free project for me since I used what I have on hand. I worked on it on and off for about a week. Mainly because it would come up a storm.

After!