My Version of Paper Bag Floor
I’ve hung on to some family books for years because I just couldn’t toss them. I wanted to put my ancestors’ books to use in my 120 year old house that’s been in my family for FOUR generations. Every time I cleaned I wanted to toss the books but I just moved them from place to place waiting for the perfect project. Some are in Czech brought over the years by visiting relatives. Some were my grandpa’s when he was a kid and sick with polio in this very house. Luckily he survived and that’s how I got here! I investigated the value of each book, some were pretty beat up, before I put them to use just to be sure I wasn’t destroying a masterpiece. My advice if you do this is, make sure the value of the book under-weighs the need for a new floor.

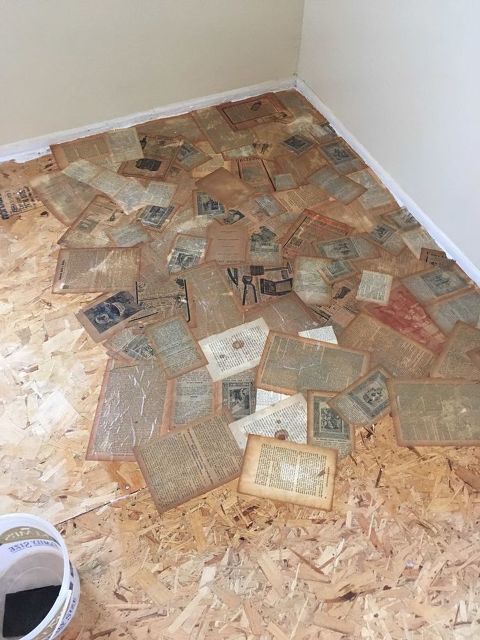
Here’s the books I started with. Over a plywood sub floor–removed the nails, tacks, dirt, 30-year-old, well-used carpet, and a pad (which we got from a neighbor-because we were too broke at the time we put the carpet in to afford a pad and the neighbors were putting in new carpet and gave us the good parts of their old carpet pad) and vacuumed, swept–all that usual prep, first

I first filled all the gaps with some caulking I had (not even sure what kind it was but all my caulking accepts paint.) Two tubes did the trick between the plywood joints and around the perimeter of the room. I left that dry overnight. The next day I mixed the glue about 30% Elmer’s glue and 70% water. I tried to soak the pages like I read to do in Paper Bag applications in 50%/50% glue/water but the pages fell apart—they were just too old to withstand the heavy glue so I increased the water ratio. I still couldn’t get the pages to stay together when I soaked them so I ended up brushing the glue/water mix directly on the floor and laying the pages down then brushing the glue mix on top and letting it dry. A 30%/70% mix worked better than the recommended 50%/50%.

Here’s the first corner and its wet. At this point I thought, “What have I done???!!! It looks like crap and now my books are ruined and I’ll have to get carpet.” But, like the stubborn girl I am, I persisted.

and another of the same corner-and I was nearly going to stop here and just head to the carpet store and pick up a roll of carpet and pad to cover up this mess I made!

And the closet that I’m starting to like as it drys but not loving it and still wondering what I can do to fix the mess. I was thinking getting it wet and scraping it up and replacing with cheap sticky tiles.

Here’s after I applied the first coat of polyurethane and the floor dried. Once I got that first coat of poly on the floor I was in love. I rolled the poly with a short pile roller attached to an extension (no hands and knees)-poured it on, rolled it out-poured it on in another spot, rolled it out, starting in the closet and working toward the doorway (was actually thinking how NOT to get myself wedged into the corner!) Ventilation was important.

And another angle after 2 coats and letting it dry overnight. In the lower right corner, you can see that I moved my Great-Great-Great Grandmother’s rocker in because the door to this room is so narrow we have to take it off to get some of the furniture in and out. {I’m planning on posting the reupholster project of that antique chair, along with my other projects on a blog–someday–I’ll update this article when I do with a link. Until then, you can look in the Nebraska archives of my regular blog https://annettesnyder.blogspot.com/search/label/Nebraska to see a bit of my other projects}

Here’s 2 coats of poly and moving in the heavier furniture after about a week. I only did 2 coats of good floor polyurethane recommended by the floor guy at Menards. It was probably the most expensive stuff, or close to it, on this project because I had everything else, except the Elmers Glue. I only did 2 coats because it’s a low traffic room. I used not quite a gallon.

Another angle of the room–The room is about 9’X13′ with a 4’X4′ closet and windows on the east and south…so, twin bed and dresser plus a chair and all in, the project took about 2 weeks after work about an hour a night, leaving the glue to dry for 3 days and each coat of poly to dry overnight.

I waited about a week to move the extra furniture in and put down an area rug. Its formerly my girls room (2 natural born girls and 6 exchange girls-which explains the need for a new floor! :)) And, I’m happy with it. And, since I live in a small town, people have started to show up just to see my floor and they also love it. I think my grandpa and other ancestors would be proud of the results using their books. Mission accomplished!